How to start coding
Integrating with a code editor
You need a code editor, such as Visual Studio Code, to write and edit your script. This document takes Visual Studio Code as an example.
- Download Visual Studio Code.
- Specify the external code editor as Visual Studio Code in Studio Preference.
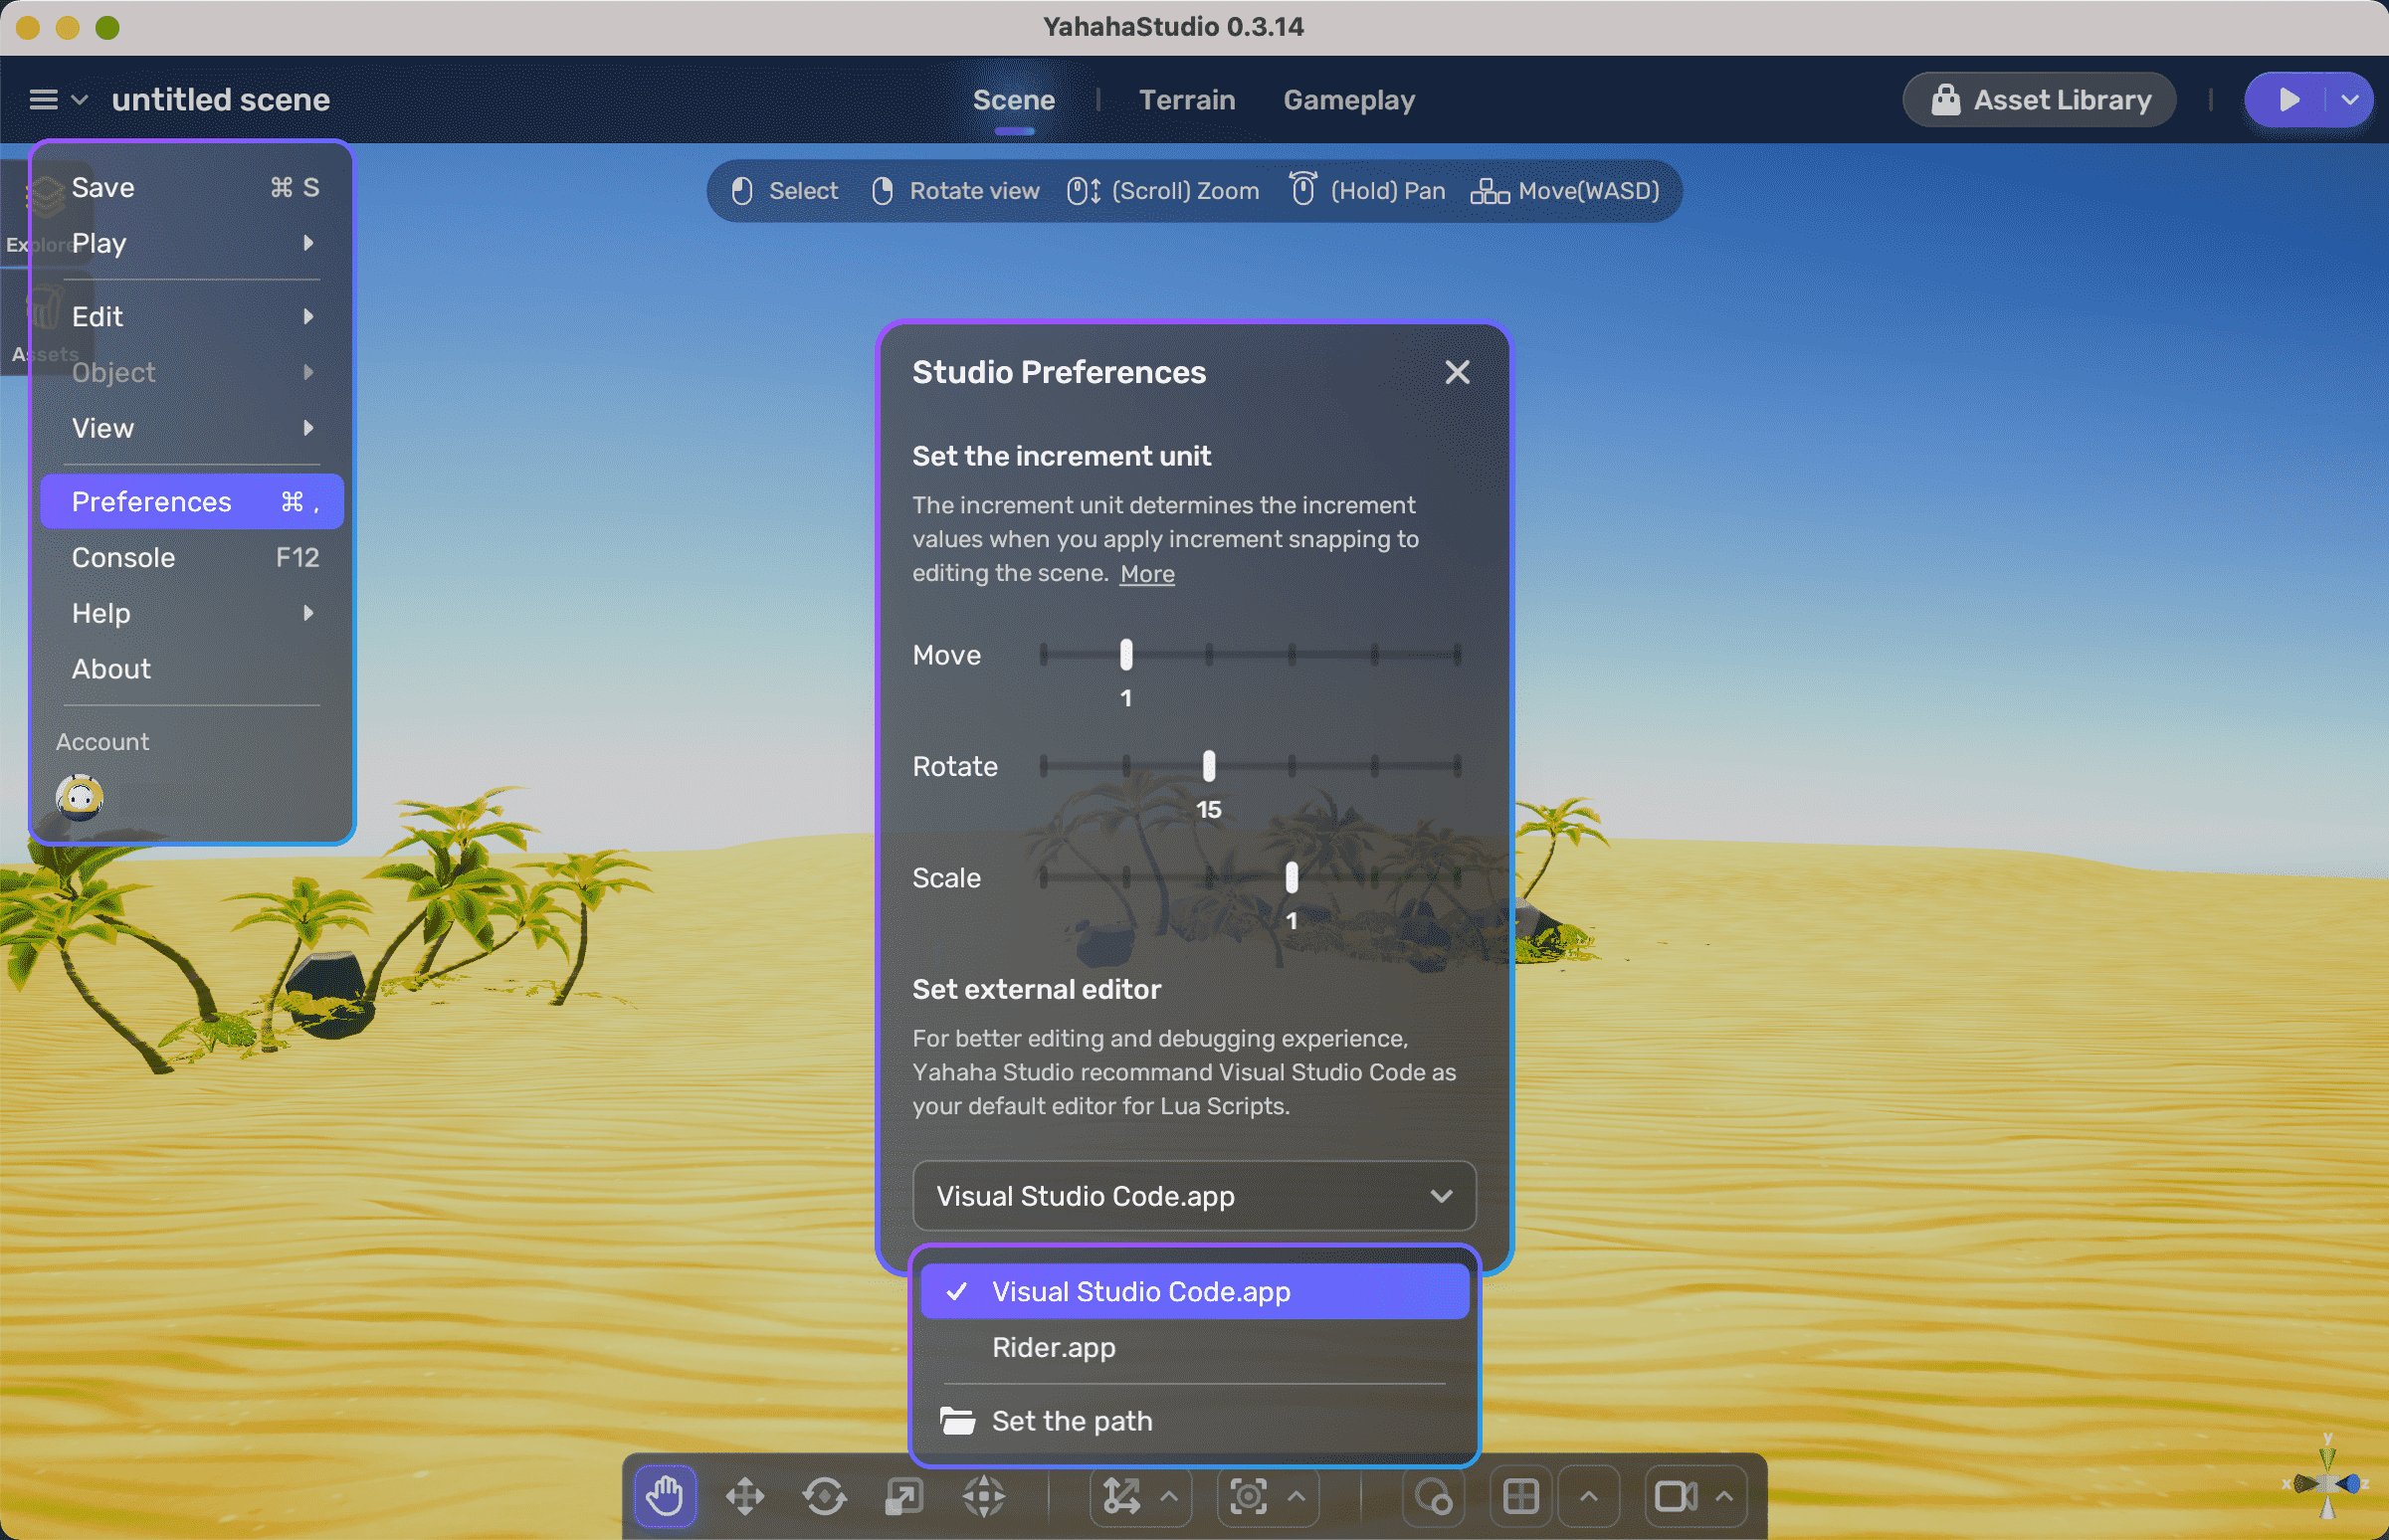
- Find Code in the folder where the Visual Studio Code is located and open it. Now Studio is integrated with the code editor.
Creating or adding scripts
- Open any space in YAHAHA Desktop.
- In the scene, choose the object that you want to write scripts for and click the More button on the upper right corner.
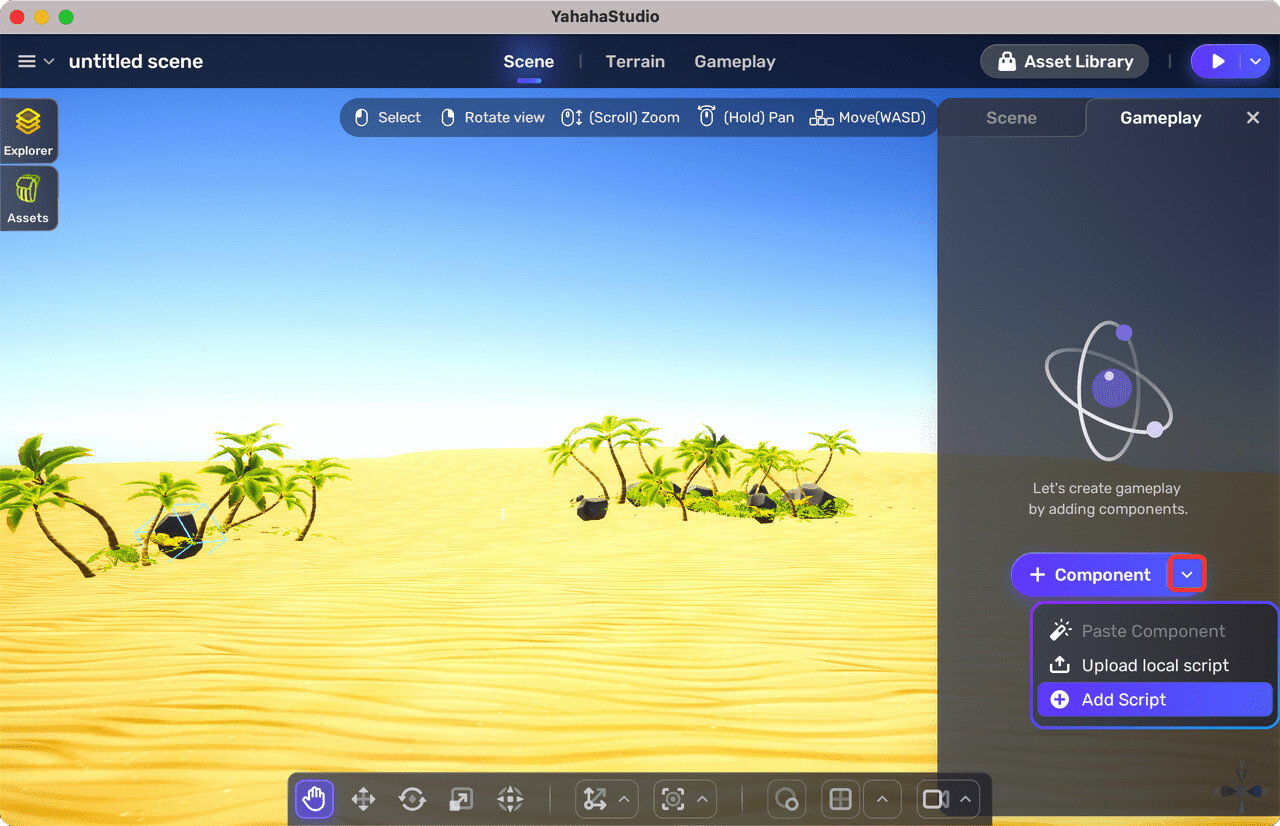
- Go to the Gameplay tab and click the drop-down arrow on the +Component button. You can either upload your local script by choosing Upload local script or create a script from scratch by choosing Add Script.
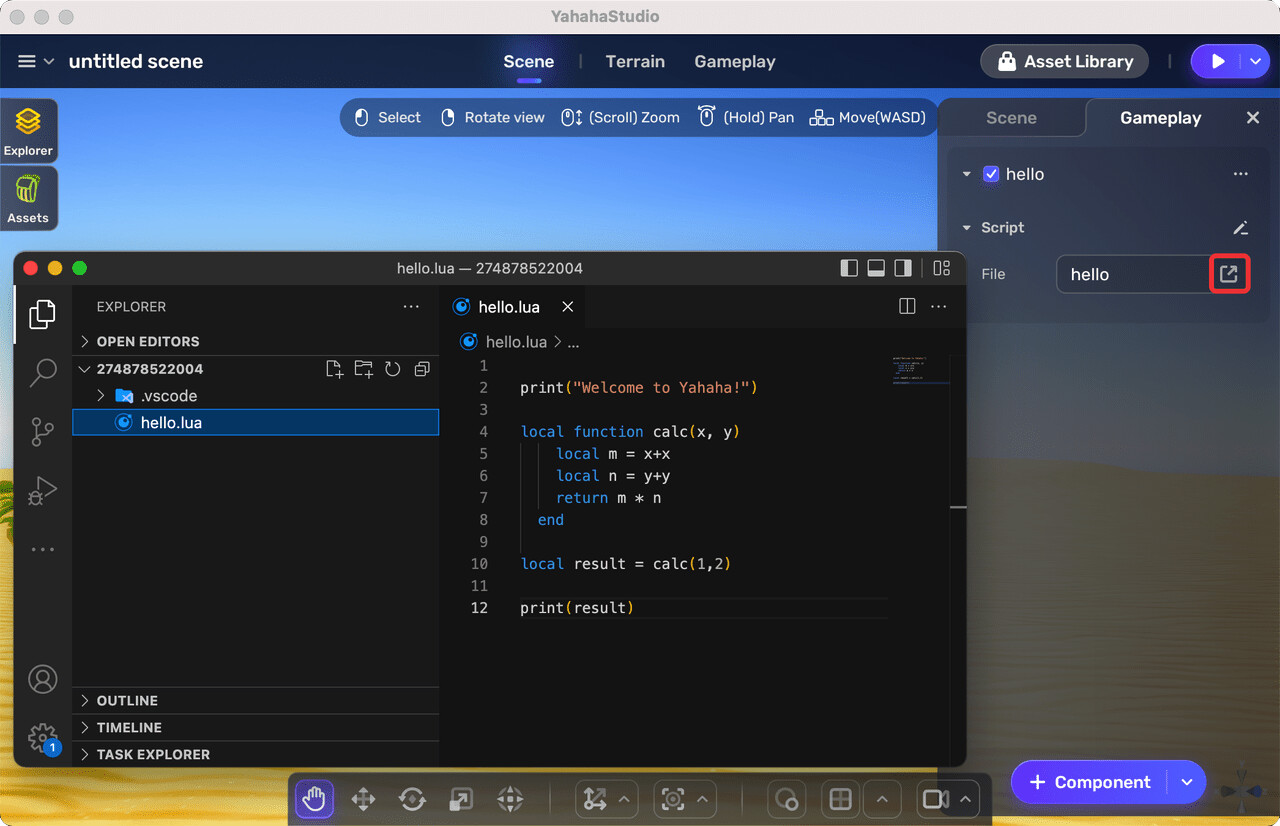
- Click the edit button to edit your script in your code editor.
Installing the YAHAHA Lua debugger
- Download the debugger
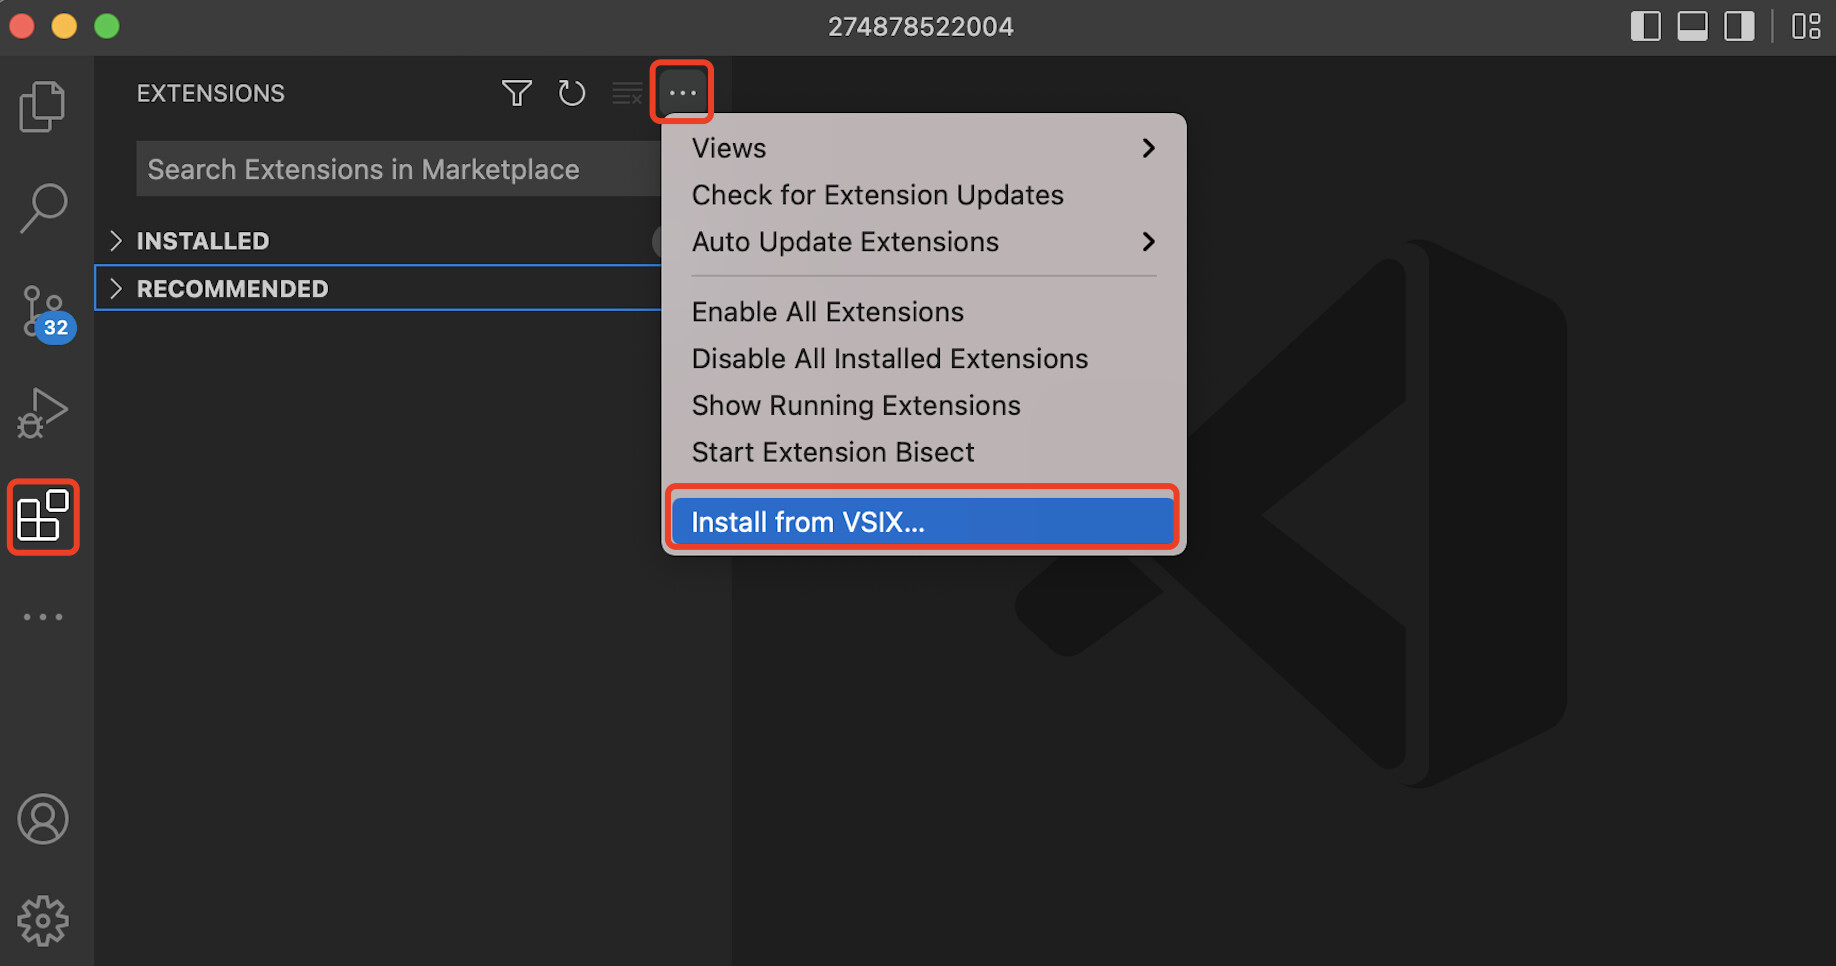
- Install the VS Code debugger by choosing … > Install from VSIX and opening the VSIX file you you just downloaded.
Configuring the YAHAHA Lua debugger
- Open the folder where the lua scripts are located.
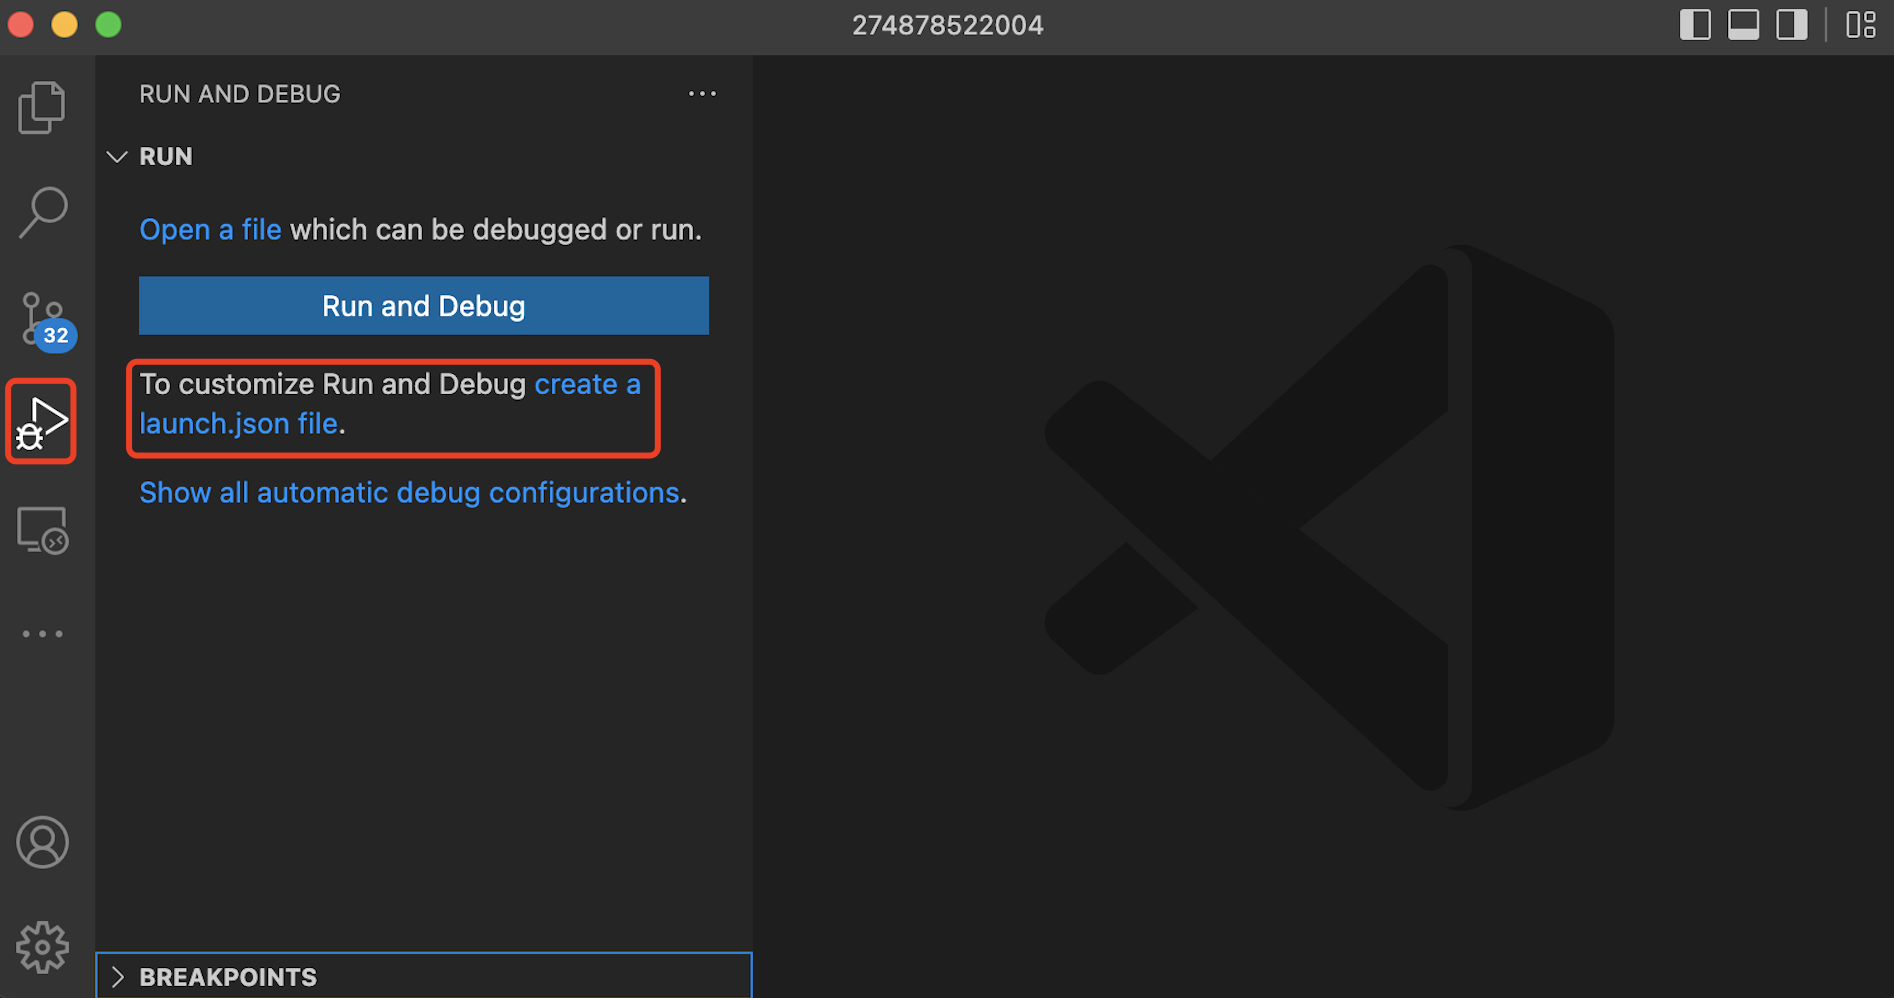
- Create a launch.json file in Run and Debug.
- Copy the following JSON over to the file you just created.
1 2 3 4 5 6 7 8 9 10 11 12 13 14 15 16 17 18 19 20 21 ```
{
// Use IntelliSense to learn about possible attributes.
// Hover to view descriptions of existing attributes.
// For more information, visit: Debugging in Visual Studio Code
“version”: “0.2.0”,
“configurations”: [
{
“type”: “yahaha_lua_mobdebug”,
“request”: “attach”,
“name”: “Yahaha Lua Debugger”,
“basedir”: “${workspaceFolder}”,
“host”: “127.0.0.1”,
“port”: 8172,
“lua-extension”: [
“.lua”,
“.lua.txt”,
“.lua.bytes”
]
}
]
}
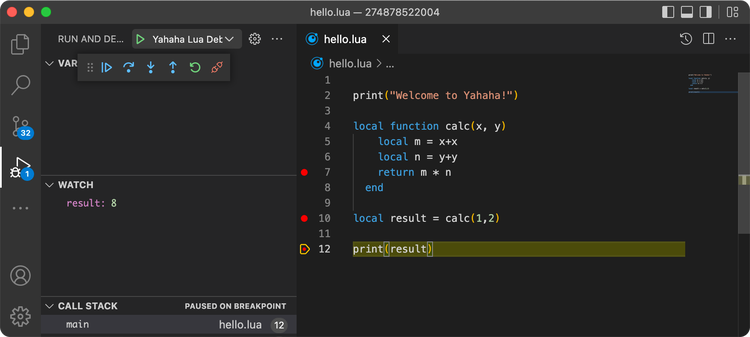
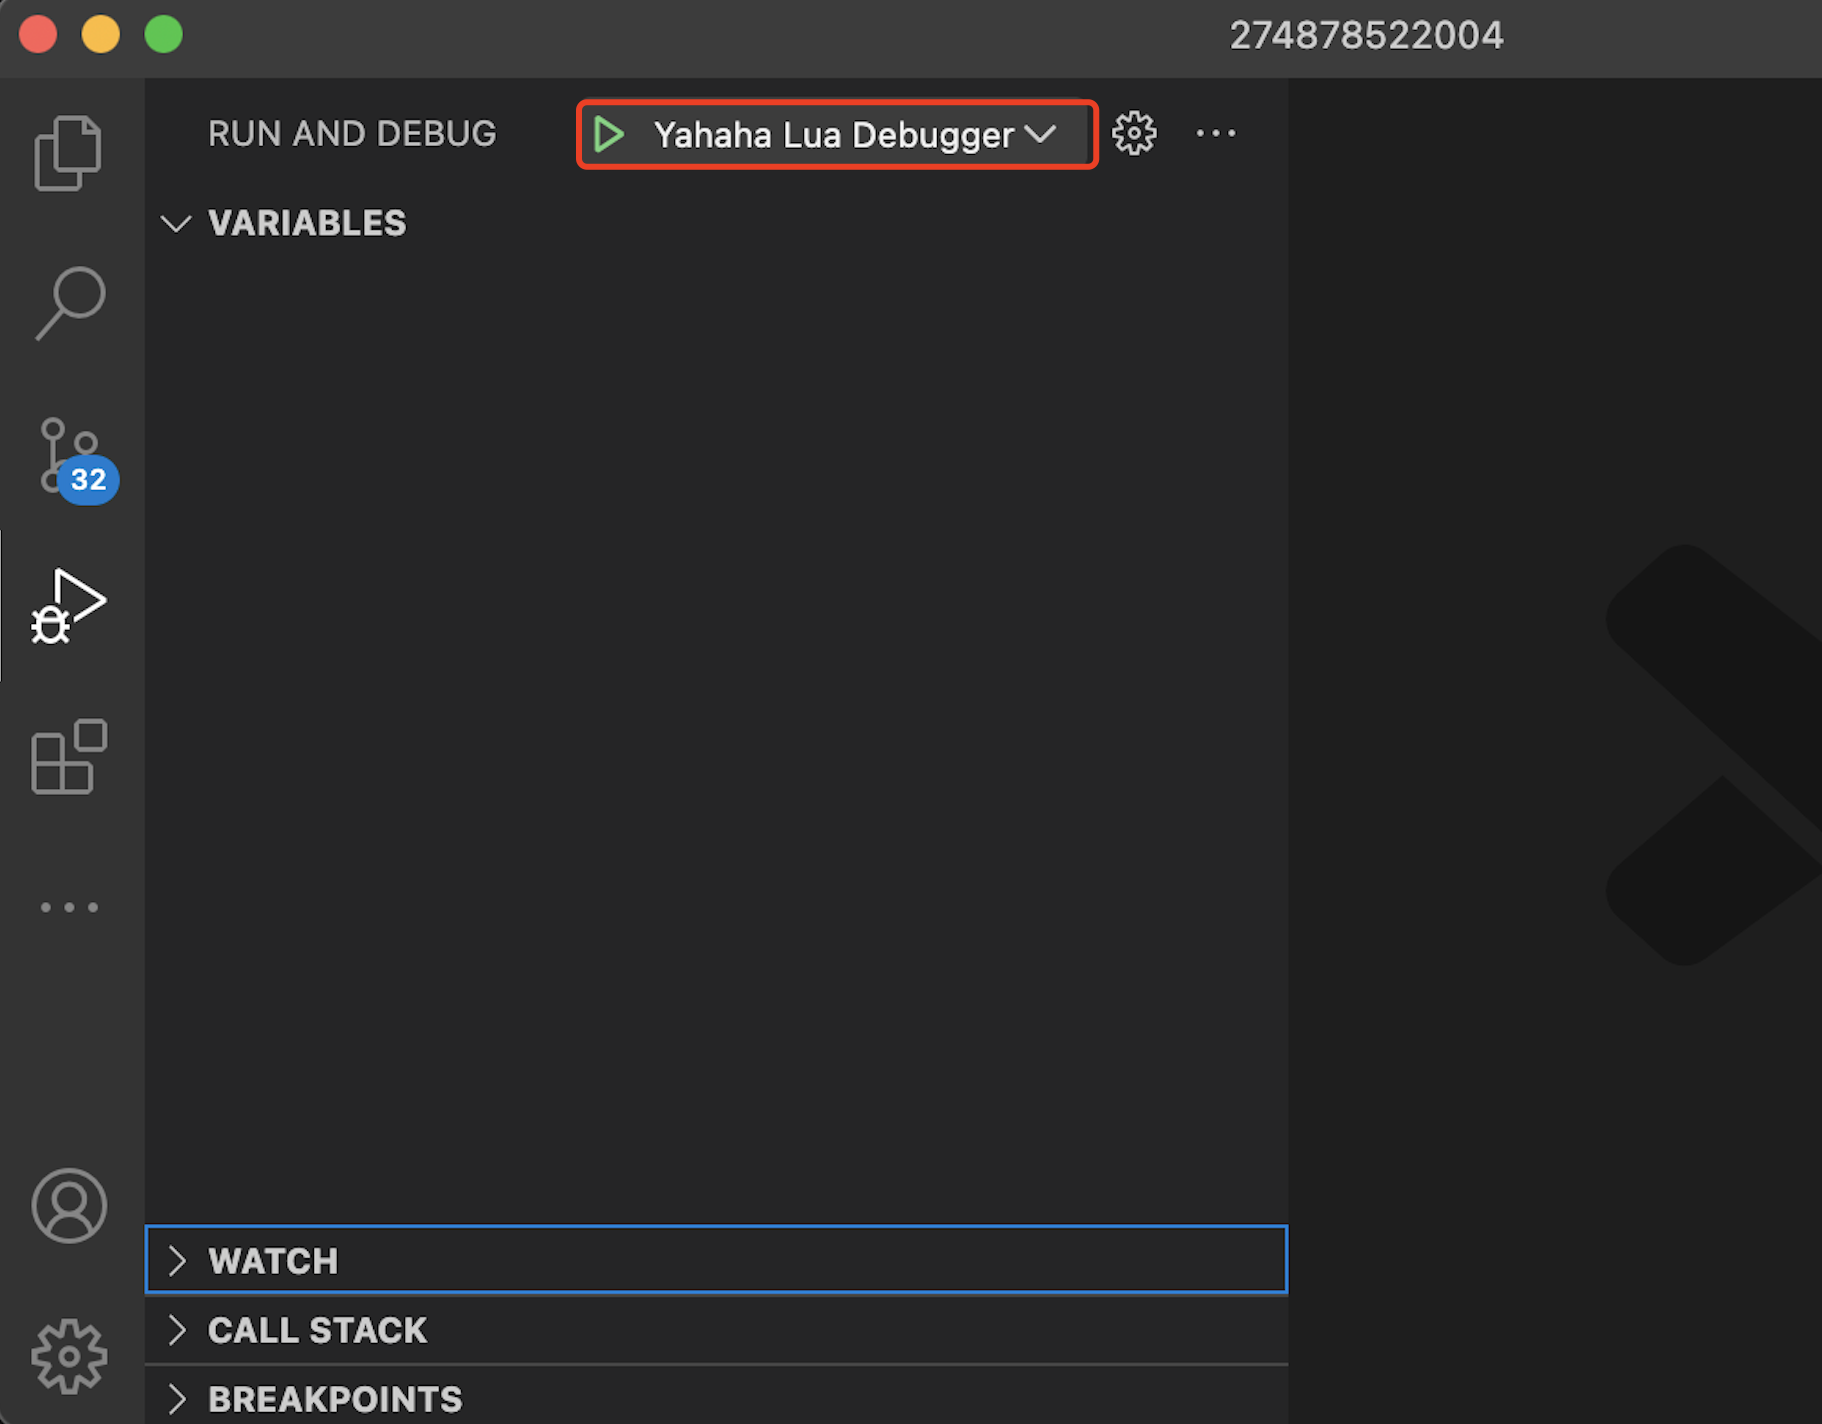
- Run the debugger to connect to YAHAHA Studio.
- Now you’ve successfully run the debugger and try to set a breakpoint in your script. YAHAHA Studio will connect to the debugger in Play mode.