Disclaimer: Everything you read here is my opinion and even I don’t believe these are the absolute truth. These aren’t hard rules, just tips.
Part 1: Ideation
Concept
Having a good concept is 50% of the work. This means immediately building the first idea you have is a bad idea. Don’t be so quick to jump the gun. Let it sit for a while, more ideas will come. If you have multiple ideas and the first one happens to be the best, go for it! But make sure you allow yourself some time to come up with some creative ideas. In the idea phase, don’t be afraid to write down weird things, don’t try to think everything out, just try to get as many ideas as you can. When you start, don’t settle. But the more you get towards the end, the more you have to stop yourself from using too many ideas, otherwise you won’t get anything done. Don’t be sad about not using all the other ideas, you can always use them another time, save them somewhere. I usually take multiple nights of sleep before I pick my best idea.
Perspective
When thinking of ideas try to change your perspective to that of the player. If you want something people will love, think about what people might love! I try to visualize in my mind how my ideas would look/feel like when playing. This is very important for later, because sometimes your work does not look/feel like how you imagined. My work never looks or feels 100% like my vision, but I try to get close. So if in a later moment in development you find out that it doesn’t feel like you imagined, try to think back to this moment. Ask yourself: “Why does my level feel different from my initial idea?”. Usually you can figure out what is going wrong if you have a good idea of your idea. Get the idea?
Theme
It’s a good practice to make your level thematic. Some ideas already come with themes, but this isn’t always the case. For my level “No Time To Reflect” I initially didn’t have a theme, just the mechanics (rising water, platformer). And just like coming up with an idea for the level, I spent some time coming up with good themes. A good theme is a theme that fits the gameplay, not the other way around. What I mean by that is: You should find an interesting gameplay element you want to create and build the rest around that. A lot of people want to build gameplay around a theme, but that rarely works, because then you put gameplay as a second priority.
I always create a little backstory for my theme. In this case it was: “You’re in a city that got hit with extreme weather conditions like hurricanes and now there is a flood coming.” I chose this because a city has a lot of verticality that I could use. It fits my gameplay goal of platforming with a rising water level. A flooding cave, for example, would also be possible. But that doesn’t feel as dramatic as a sinking city, because you don’t get to oversee the whole level. And sinking rock doesn’t hold the same emotional load as sinking homes. To recap, I first thought of gameplay and THEN thought of a fitting theme. Knowing the backstory of your design allows you to add flavor to it.
“Problems”
I immediately stumbled upon a problem with this idea. The water in Yahaha isn’t interactable. You can’t put components on it. I see a lot of people throwing away awesome ideas because of a problem. But I am very stubborn and I was still in the idea phase. So I wanted to see if I could come up with a solution.
Game design is: “Constantly bumping into problems and solving them”. I recommend everyone, even if you’re not as stubborn as me, to not give up if something seems impossible. Allow yourself some time to come up with solutions/workarounds to make that unique idea you have work. If you really can’t come up with anything it’s time to move on and think of something new, but at least you gave it a try. For my level, that meant that I figured out how to make the water rise. I could make the whole level sink INTO the water, giving the idea of a rising water level.
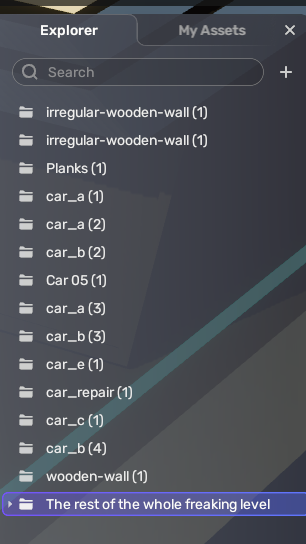
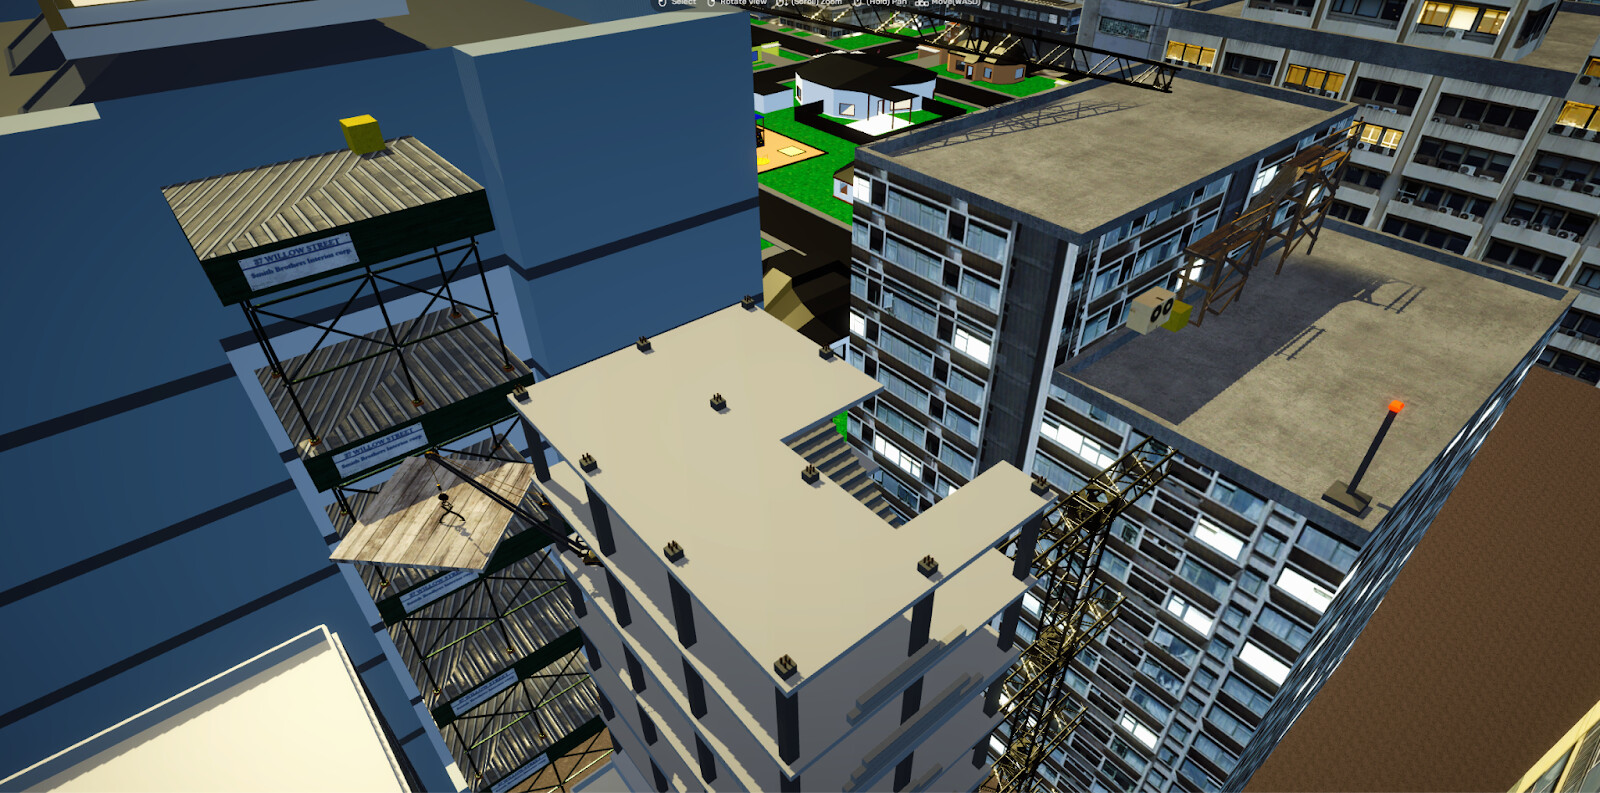
As you can see I put the “whole freaking level” in a gameobject so I could animate that. I also have some objects that I wanted to float upwards, so I didn’t put them inside. To give you an idea of how this works I made a .GIF
As the city is sinking, the other objects are floating up. I had to balance the timing of it with the gameplay, but I will talk about that later.
Sketching and Grayboxing
It’s common practice in the game industry to make a sketch of a level design. This ensures the whole team knows what the vision is and it is easier to correct errors in a drawing. They often then continue with a “grayboxing” phase. In the grayboxing phase they don’t use textures or high poly models, just simple geometric shapes to block out the level. This way, they can test the gameplay before finalizing. And THEN they continue finalizing. This is done to ensure you don’t waste time and throw away a lot of assets.
I do NOT do this with my Yahaha spaces because Yahaha has assets ready. If you make the shapes first, you would then have to find an asset that fits your shape perfectly and it should also fit your theme. I am also not working in a team, so I don’t need to make sure “we” are on the same line. But MOST of all I do not do this because placing assets in Yahaha is fast and I consider this the sketching/drawing phase already. It’s even easier for me to place a building in Yahaha then it is to draw one out. I would be wasting time by forcing myself to use these industry practices. However if you like this process feel free to try it out. It’s a good skill to learn if you want to work as a level designer in a team.
Part 2: Gathering and Flow state
Test your idea
Your idea might not work. I’m sorry to tell you, but it’s the truth. So before you start building everything, test your mechanics. It’s important to see if everything works. If your idea doesn’t work. And you tried workarounds or getting help. Pick another idea. This is the worst feeling, but be happy knowing that you didn’t build the whole thing before finding out it doesn’t work. This is why we first test out the main mechanic.
If it works, build the beginning and the ending. Congratulations, you made a fully playable experience! Everything you do after this, is to improve the experience.
In “No Time To Reflect” I just had to make sure the water was rising and the player could die when they touched the water. That’s all. I just needed content to make it exciting.
Gather resources
Ok, so you know what you want to build right? Gather everything you might need first. That means opening up the asset library and clicking on the “+” symbol for everything you might want to use. Don’t click “view in scene”, click the “+” symbol and everything will show up in the “Purchased” section in the “Assets” window. Try to not work on the level too much yet, just gather the assets you need. Because if you do, you will end up disrupting your flow later.
Imagine you want to draw something, you grab the paper and sit at a table. Oh no! You realise you forgot a pencil. So you quickly grab one and sit down again. You start drawing some outlines, but you already noticed it while drawing… you don’t have the colored pencils at hand so you quickly run back to the cabinet to grab your colored pencils and sit down. You repeat this process during the following hours for a sharpener, eraser, some water for your thirst etc. You end up:
- Slowing yourself down
- Feeling stressed
- Disrupting your flow
So, take the advice from someone who used to run around all the time. Gather everything you need first, the next part is going to be amazing because of it. I recommend doing one thing at a time (gathering, building, animating etc.), because you will be more likely to enter a flow state in which you will do the work faster than me running towards free food.
Flow state
If you gathered everything you need to build and you have an idea of what you want. Go ahead and start building. If you’re new to this you will probably find out you are missing a lot of stuff still, don’t worry just grab those as you go. If you DO have everything you need I recommend doing this phase undistracted for a few hours. That means phone on silent, discord on mute and maybe some relaxing or monotonous music. After a while you will likely get into a flow state where you are intuitively working, not even noticing that you are thinking. Hours will pass that will feel like a few minutes and your work will be 10x faster than normal. When this happens to me I can do more work in 1 afternoon than I do in a week.
If you still get distracted throughout, don’t worry, this takes a while to learn. Just like a muscle, you can train your focus. If you want to fast-track your focus muscle, I recommend a concentrated meditation, where you focus on your breathing or 1 point in your vision, like a treetop. Either way, if you are not used to this it will take some time to learn, but it will be worth it.
Next up I will give some insights on how I actually built the levels. It will have more practical tips than the ideation and preparation phase, which you can apply to your own levels as well.
Part 3: Level Design
In this part I will give some practical level design tips using my level No Time to Reflect as an example.
Hook
It’s good to have a hook in the beginning of your level. Something that makes the player go: “Oh what’s that?” Or “What is going on here?” Anything that piques the players interest.
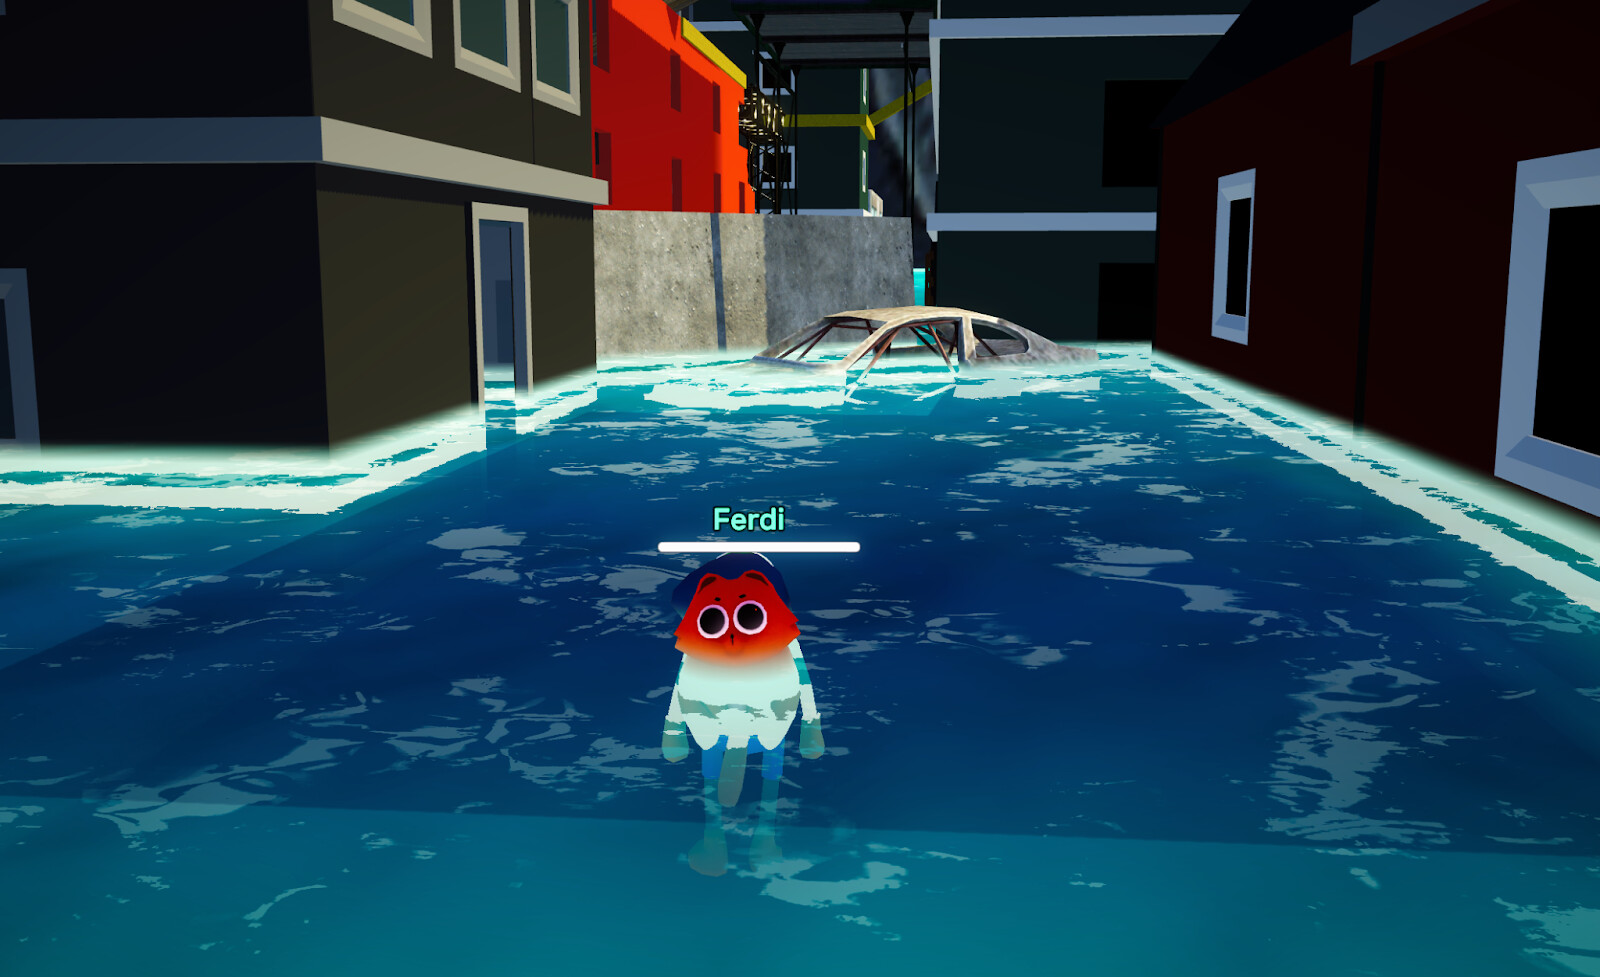
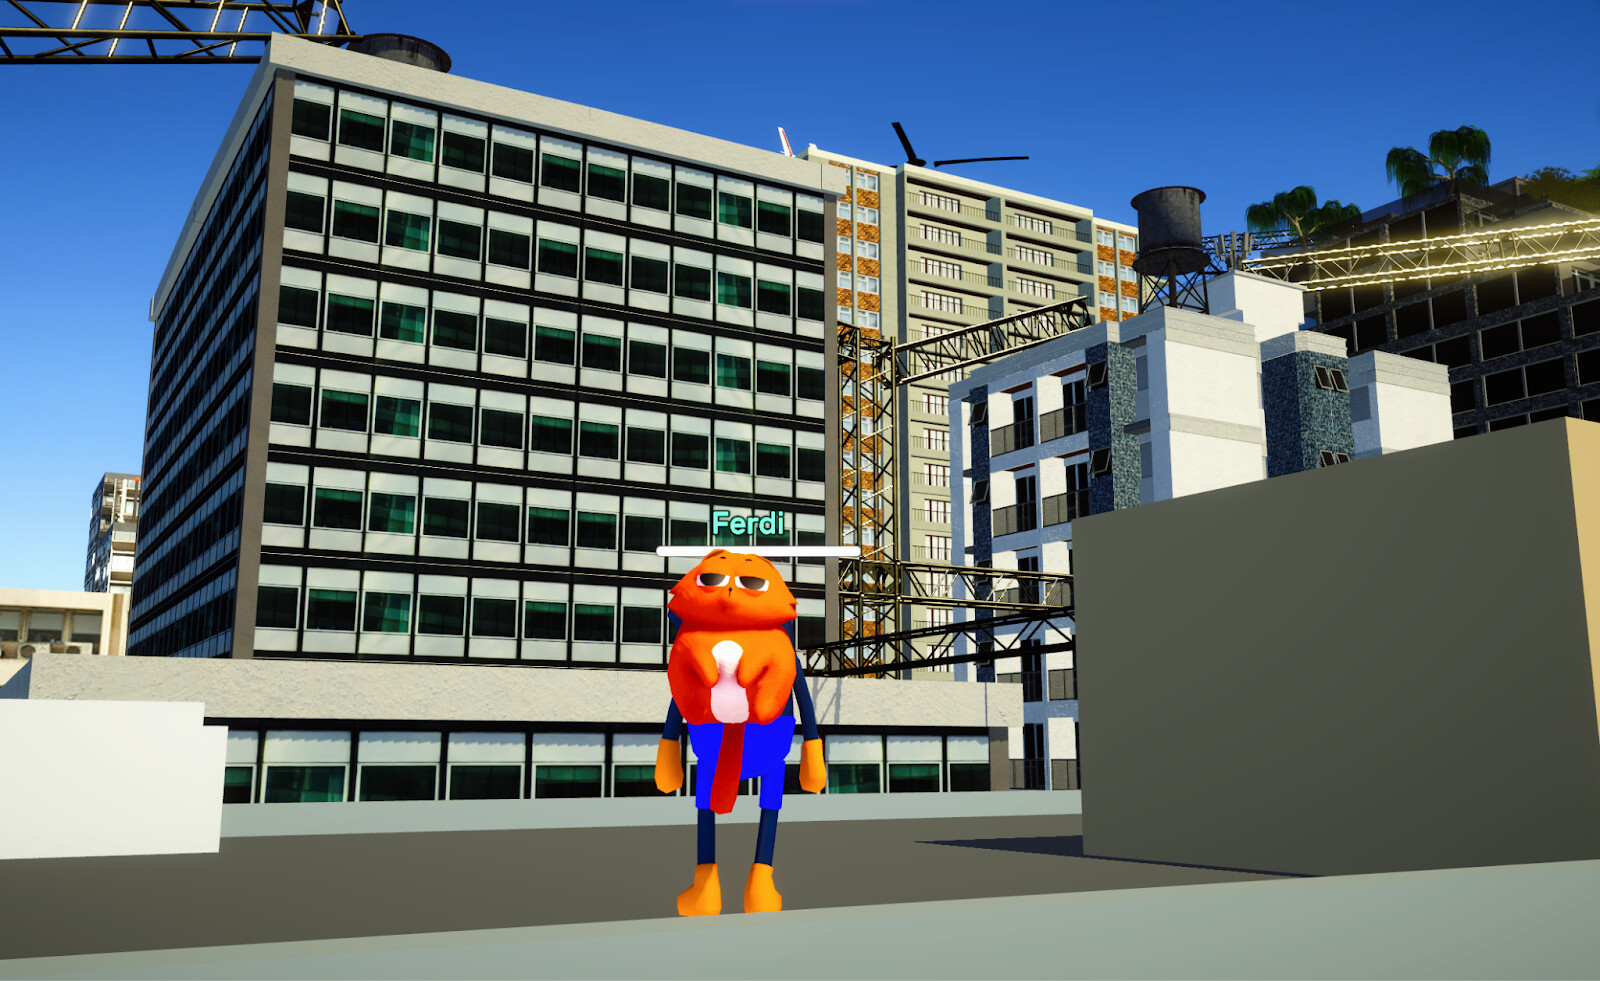
In No Time to Reflect, the players start out like this:

The player can see the city around them and think: “Ok whatever, it’s a big city”. But then…

The water rises under their feet giving them an “Oh shit!” moment. You suddenly realise you have got to get somewhere safe. Now the real game starts.
Other examples could’ve been:
- A place in the distance that looks pretty/mysterious/different.
- Something moving (like Meister Murloc’s Solarpunk Valley which features a flying Spaceship).
- An interesting enemy.
- Or…NOTHING. Emptiness can also be unsettling and unique.
Getting players’ attention towards something in your level (which will move them that way) is called signposting.
Signposting
Signposting in level design is when you direct the player towards the goal.
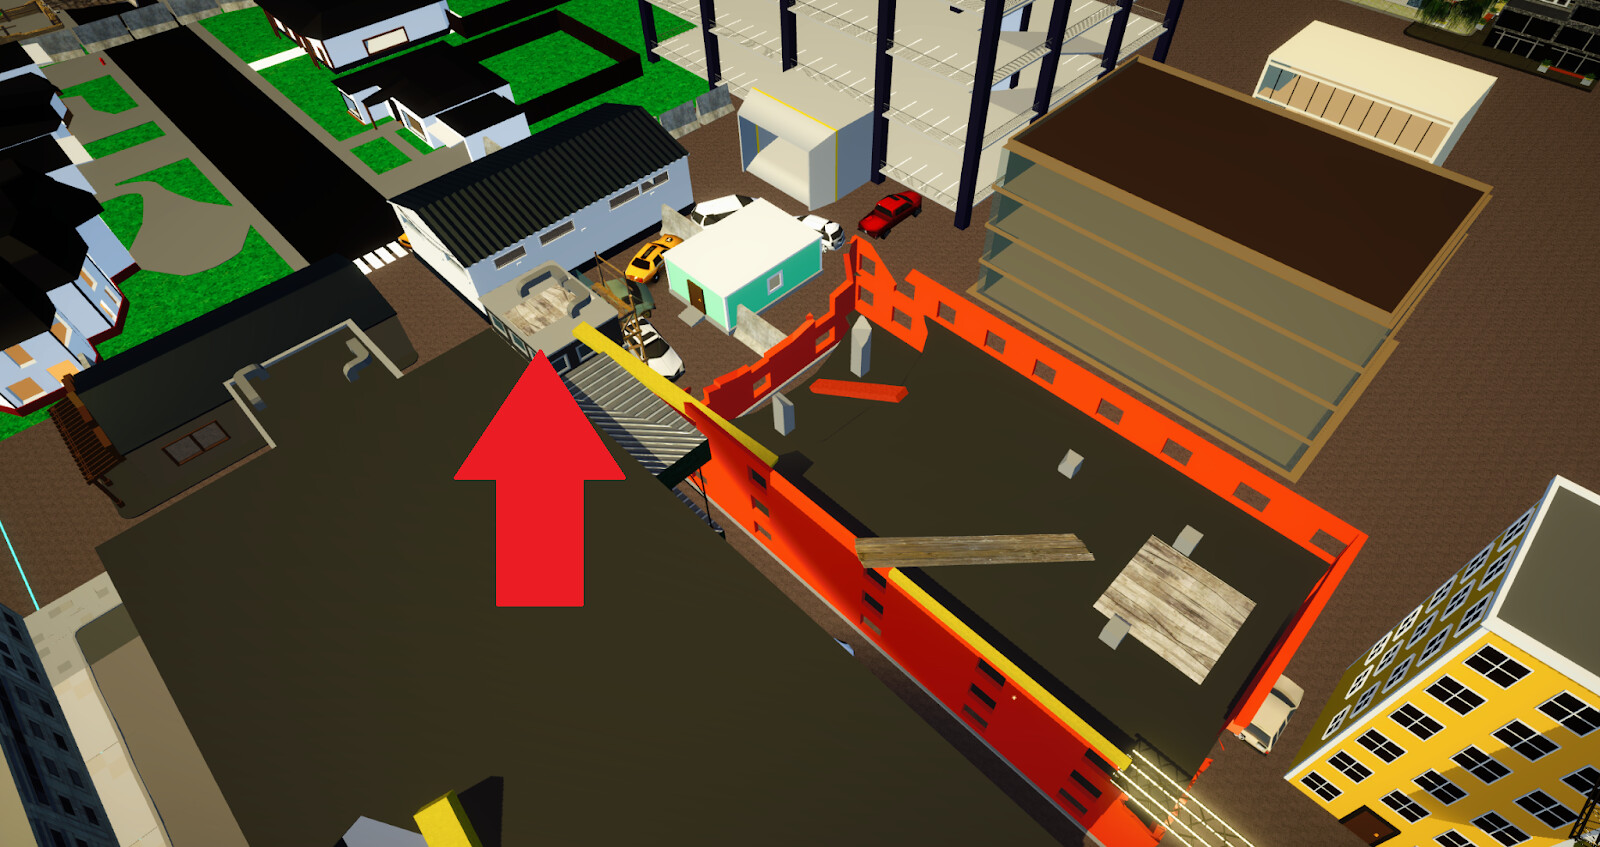
Bad example
In the previous image you can see the only route the player can actually take. If the player actually does make it to the end of this corridor, they will (hopefully) see this door:
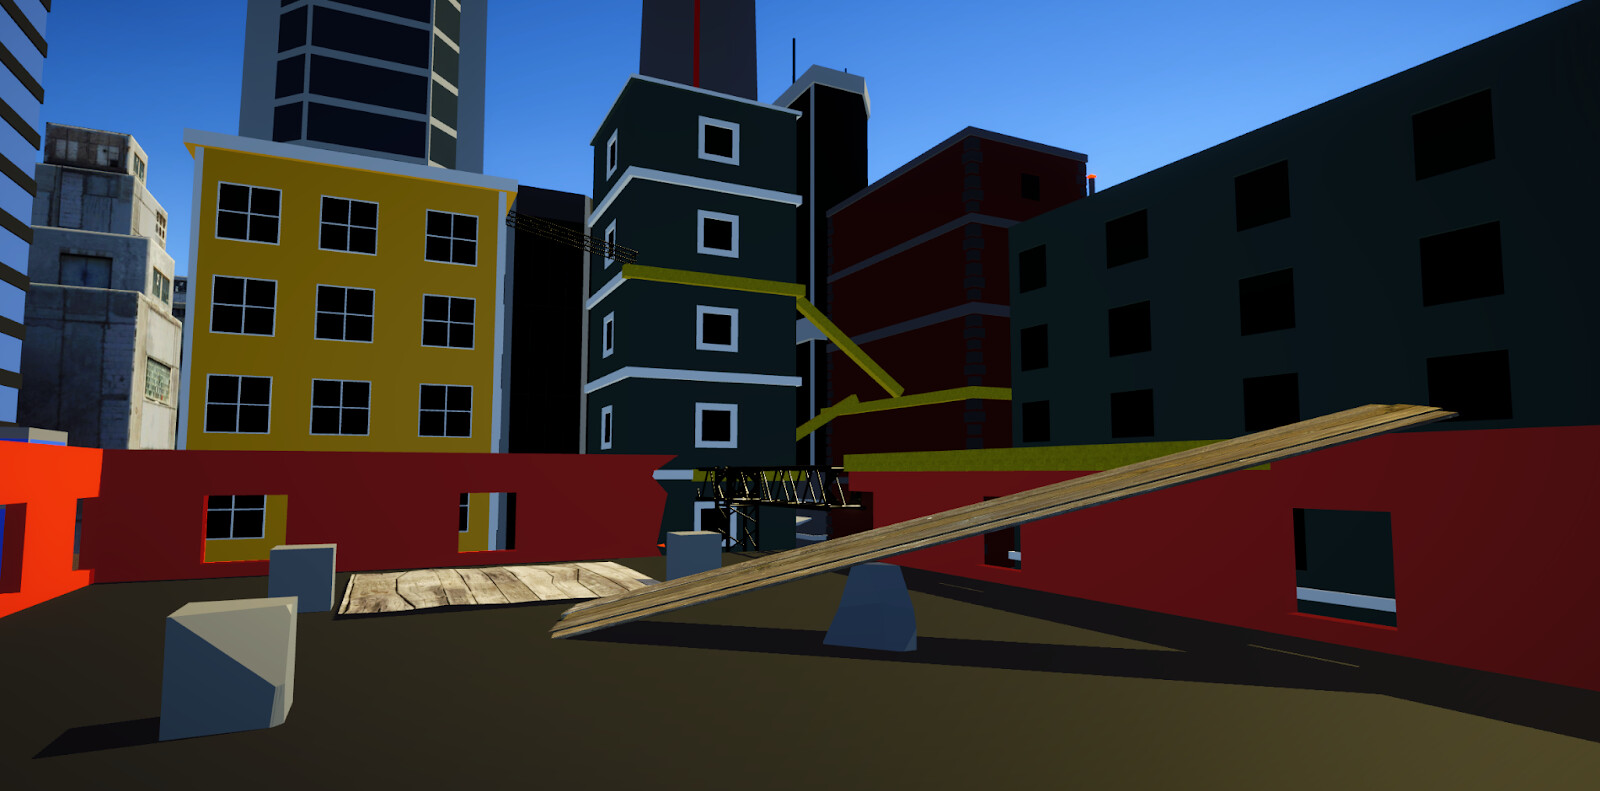
This is an example of bad signposting. Because the player might want to go on top of the car to jump over the roadblock. It could be improved by having something pointing towards the door. To keep it within the theme, maybe a pole fell in and broke the door open.
I kept it like this, because panicking about the route is part of the theme.
Good example
The yellow ledges I used later on clearly show where the player needs to go.
I’ve used this when prototyping in the past as well, and this has never gone wrong. Player’s always know where to go. It’s like a breadcrumb trail.
I got inspired by Mirror’s Edge use of color for signposting
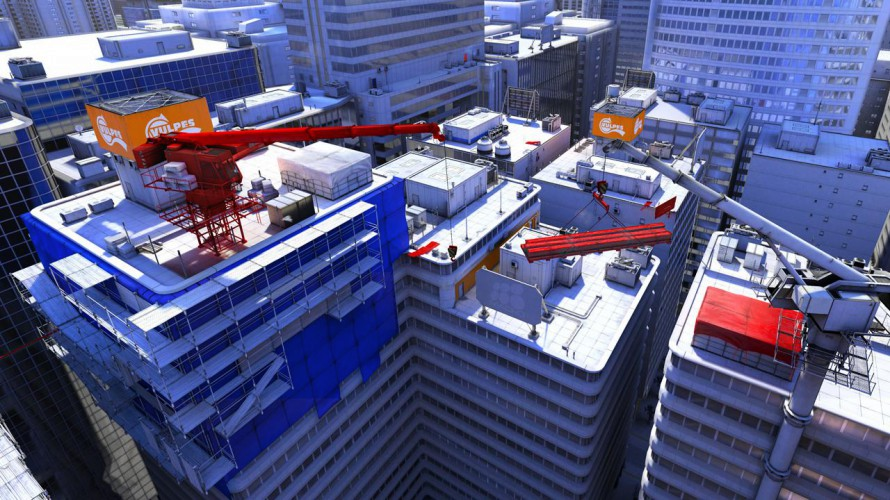
The reason I chose yellow instead of red, is because it contrasts well with the bluish hues of the city and the water. Next to that, I already had a yellow building where player’s needed to get to and I also wanted to use yellow construction assets, like cranes, but I couldn’t find any. (After I made this level, YAHAHA added tons of assets, including yellow construction vehicles).
Be careful with signposting if your goal is for the player to figure it out themselves. Because signposting will make figuring out the route easier. For No Time to Reflect the players are in a hurry, so I needed to show the way sometimes.
You don’t have to use color for signposting. It can be anything that draws the player’s attention. Like a tall building, a bright light or something that moves for example.
I use the blades of the helicopter later to foreshadow, but also show the player where they need to go:
Two Birds One Stone
Like that helicopter in the previous example it’s often more elegant to use something you already have for a second goal. I would recommend doing that instead of using something new, if possible. As an example: The wooden plateau in the beginning is used 2 times as a route.
First when you climb the building and later when the plateau starts floating on the water. I do the same with those cars and wooden planks.
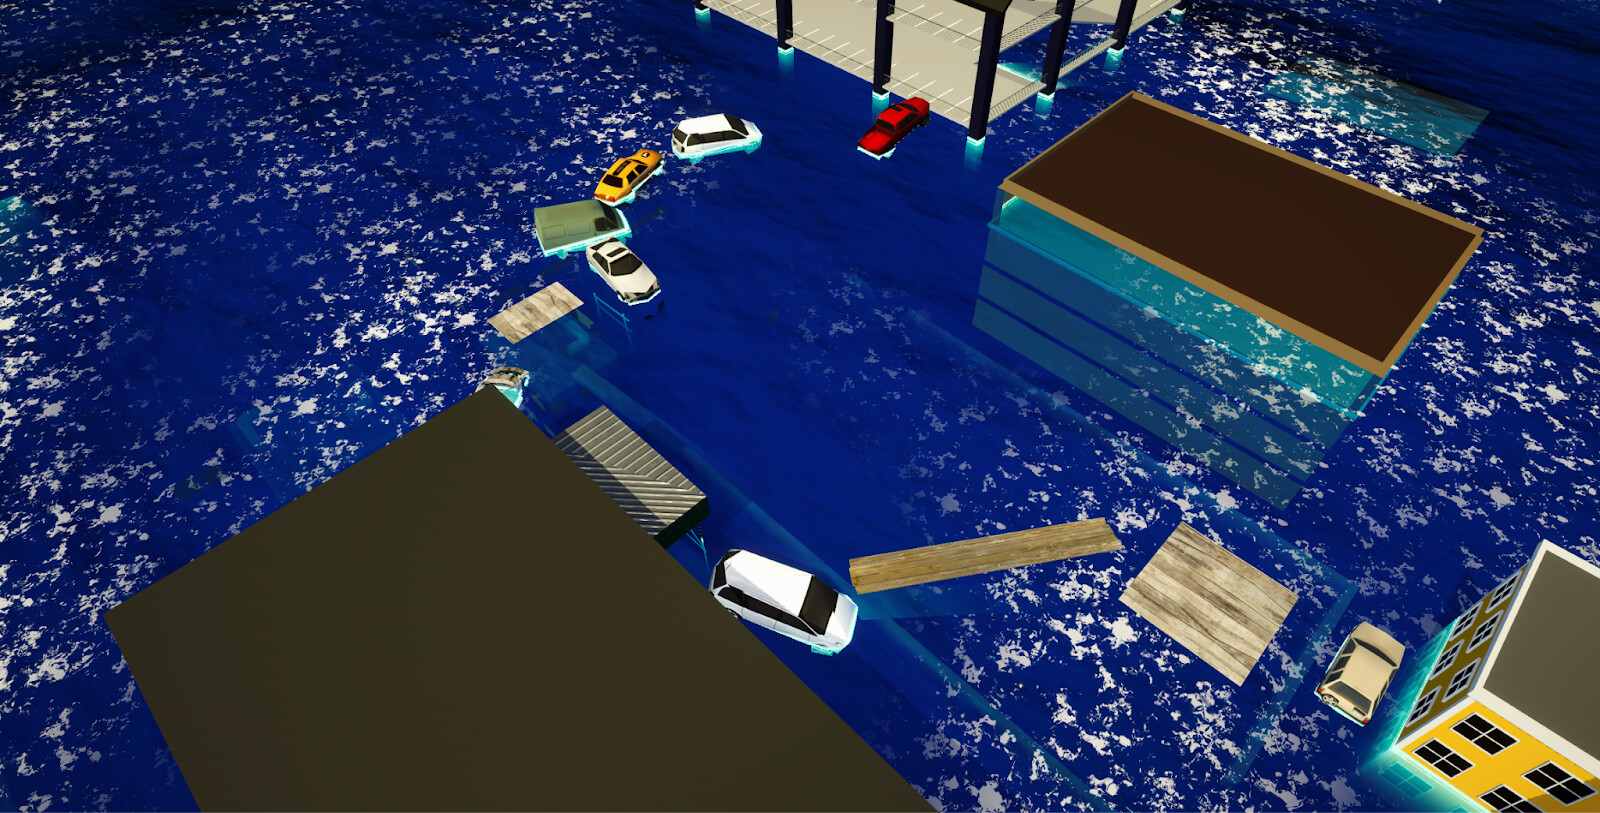
If you have a similar situation, this would be a good spot to place your spawn point. I use this plateau as a spawn point when:
- Players die in the beginning because they weren’t fast enough. This allows them to continue the level from basically the beginning, only skipping climbing the building.
- Players die later on, when they are platforming on the floating objects above the water.
So that’s 2 uses for platforming and 2 uses as spawnpoint. Four uses for one object, not counting its aesthetic/thematic value.
But giving the player a choice in the route is also a good way to get two birds in one stone.
Player Agency
We’re making games, not movies. So don’t be afraid to give the player a choice. Players like choices. In No Time To Reflect I have multiple moments where you can take another route. I’m not going to spoil them all, but one example is the garage.
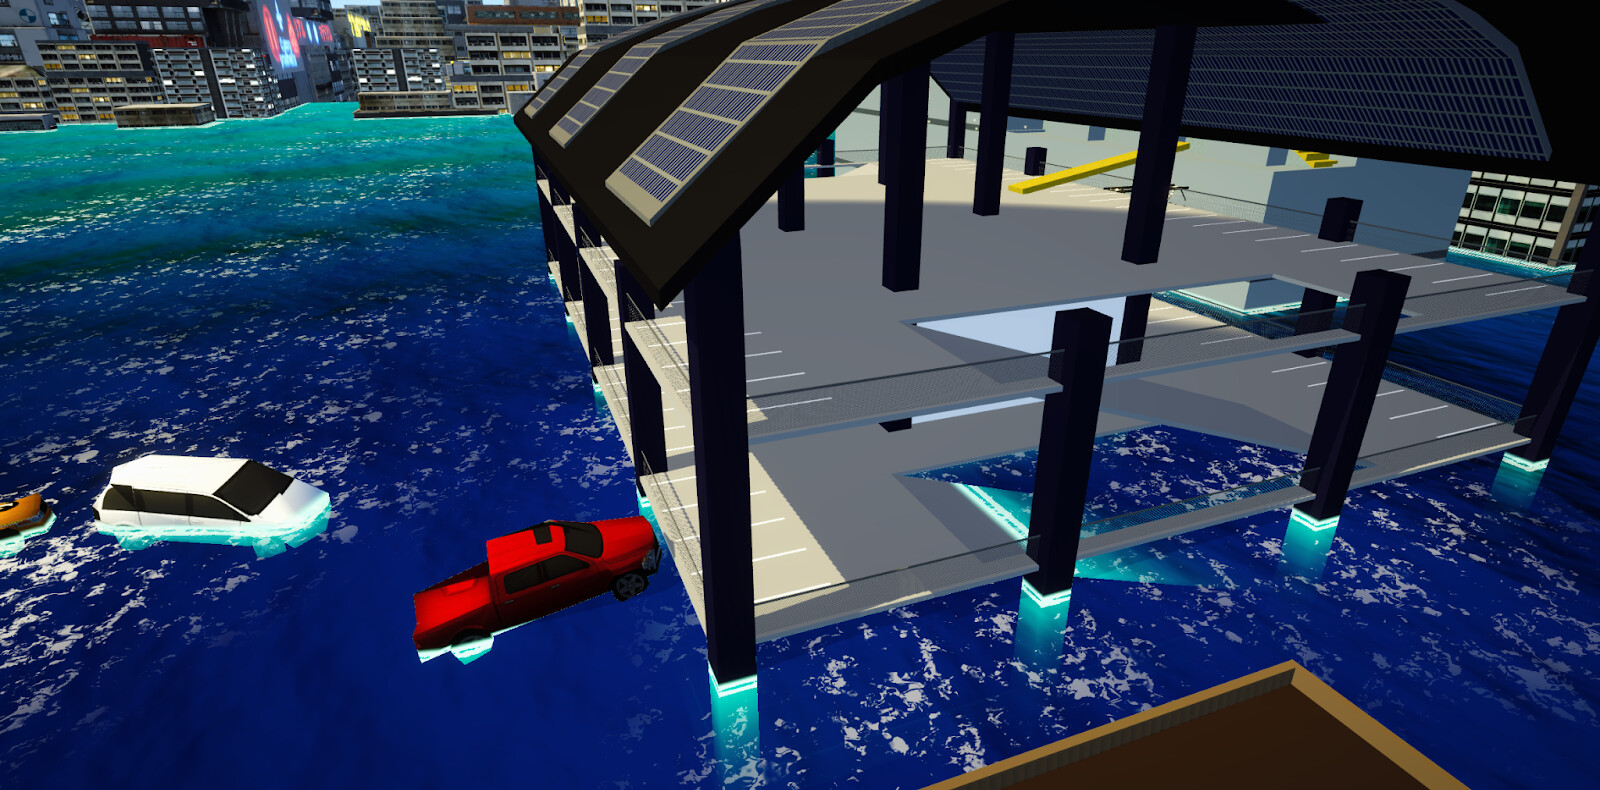
If the player is fast enough they can make it to the second to last floor. But if they aren’t they can use the top floor. This does 2 things.
- It gives players a choice.
- It gives the players that are fast a challenge and the players that are slow leniency.
Which brings me to my next point.
Designing for multiple players.
When designing your games it’s easy to make an experience that’s perfect for you. But by the time you can play the full experience, you have already played it a lot (I hope) and are probably an expert by now. There are multiple things you can do to make the experience more fitting for players of multiple skill levels
Options/Choices
As explained in the previous example, you can give the player multiple options to do something. This will automatically give players the option to pick their own challenge. In the case of my design, this meant multiple routes.
Testing
You have to constantly test if things are working like you want it to. So play your own creation to check.
Playtesting
If you fixed most of the problems you know of, do a playtest session. Preferably with multiple people (not necessarily at the same time) to check if your design is clear. If you know the solution to your design, it’s impossible to know how someone who doesn’t would approach it. Do this and I guarantee you, you will notice improvements you can make that you didn’t before. It’s good practice to write down what needs to be improved while observing the playtest. Yes, observe. It’s important you see what the other players are doing, because if they don’t understand something and continue, they won’t tell you: “I thought the car in the beginning was a platform to jump over the roadblock, because you are not signposting the door opening clearly enough.” They will say things like: “The water rises too fast in the beginning.” So if you don’t see what’s going wrong, you might fix the wrong thing.
Yahaha has recently added the option to share your drafts. Be wary when watching others play online instead of in real life, that you won’t be able to see their responses and non-verbal cues. It’s still better than not playtesting at all, but tests in real life are better.
Balancing
Often games need balancing. More damage? Less armor? More speed? Etc. For No Time To Reflect, I spent hours on getting the rising water speed just right. The water has multiple stages where it accelerates, these speeds needed to be finetuned, tested and tweaked many times to make the experience enjoyable.
It’s a difficult task to balance something so that it’s not too easy for some players, but also not too hard for others. The reason you sometimes have to wait for the water to rise more in No Time to Reflect, is because the slower players “are catching up”. I designed it in a way that the faster players can help the slower players to point the way. But many people play alone, so I still needed to have some breathing space for the slower players sometimes. The nice thing is, it can also keep it tense for the faster players, because they might panic a little when they see the water rising but no way to go forward.
If there were no waiting moment in No Time To Reflect, the fast players would not feel any pressure after the first 10% of the level. But because of these waiting moments, they have to keep up as well. I purposely added multiple short waiting moments through the level. This works better because you have:
- Shorter waiting times.
- Moments throughout where you feel the pressure again if you were moving very fast.
I also used many checkpoints. Expert players won’t even notice these so it doesn’t change their experience, but for the slower players these are a gift from the heavens. It’s the reason I didn’t improve the signposting at the start, because if you are too slow, you will respawn at a safe spot anyways.
Feedback
If you’ve tested your game, or often even after release, you might get feedback. Try not to feel attacked, please don’t blame the player and try to figure out what can be improved.
I got the following feedback from a player: “I tried playing and almost got to the end, although I feel the level is well built it feels a bit bad when you have to wait for the sea level to catch up with you so you can keep going up.”
Right now you are probably thinking the same thing I initially said, which is: “That’s intentional, the game is designed for players of multiple skill levels”
But after talking and further investigation I found out there is a spot with way too much waiting time for the faster players.
In this spot I let the players wait until the plank rises with the water. But players that are fast had to wait more than a minute in this spot. The building/route on the right was added after release. It’s inaccessible for slow players because of the water, but it’s there for the faster players so they don’t have to wait that long.
Conclusion
To summarize we:
- Get an idea
- Test the idea
- Gather resources to build
- Build in a flow state
- Test, iterate, playtest and iterate again
- Publish
- And maybe iterate some more if needed
Be careful not to linger too long on old spaces. You learn a lot from your first creations, so it’s easy to keep improving your first design, but it’s often better to move on to the next one.
I hope this posts helps you to create better experiences. If you have any questions or feedback, hit me up.
Here is the link to No Time To Reflect if you want to see some of these practices for yourself: