Node Graph is a visual coding system with node-based coding workflow. All the nodes in the system are generated directly from Yahaha API (How to start coding - YAHAHA Docs), which means Node Graph could create as cool a gameplay feature as Lua scripting can do with no limitation.
Attaching NodeGraph file on a GameObject
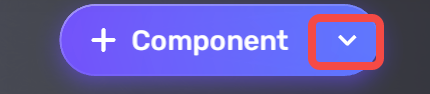
Once you open the newly designed Properties inspector of the GameObject and you want to attach a Node Graph file. It’s easy to find the "more options " button at the bottom.
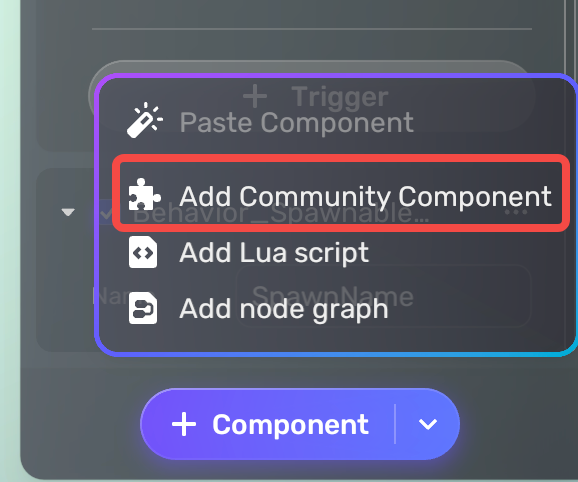
- Click the “more options” button
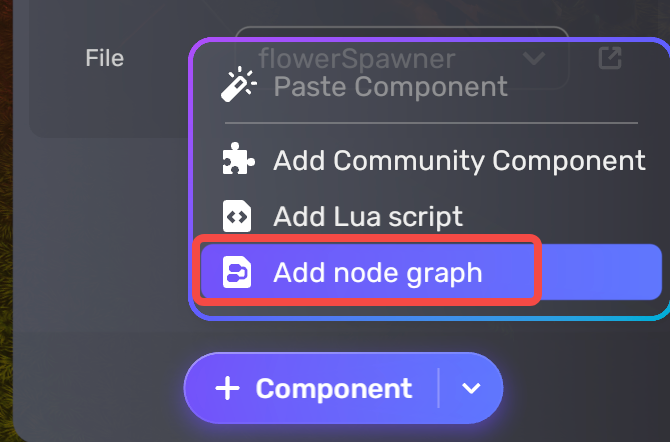
- Click “add node graph”
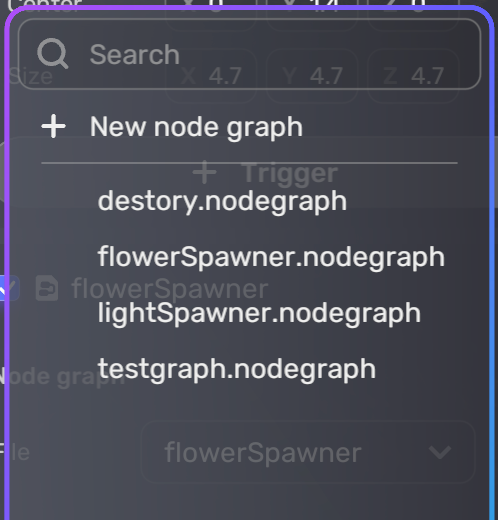
- Click “New node graph” to create a new node graph file. You can also pick node graph files you created before and attach them to this GameObejct from the list below.
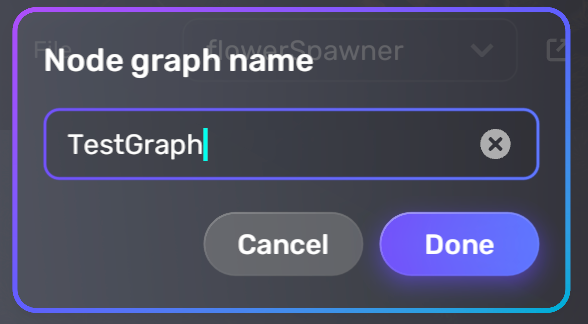
- After giving a name to your new node graph and clicking the “Done” button, VS Code will open with our customized extension for node graph editing installed. Make sure you have integrated VS Code as the external code editor (How to start coding - YAHAHA Docs)for Studio
- When you open the node graph in VS Code with Yahaha Extension for the first time, it will enter Restricted Mode automatically. Click the “Manage” button for the following action.

- To use all the functions properly, it is necessary to add the following Yahaha Studio sandbox paths to the Visual Studio Code Trusted Folder by clicking the “Add Folder” button and finding the paths below based on your operating system.
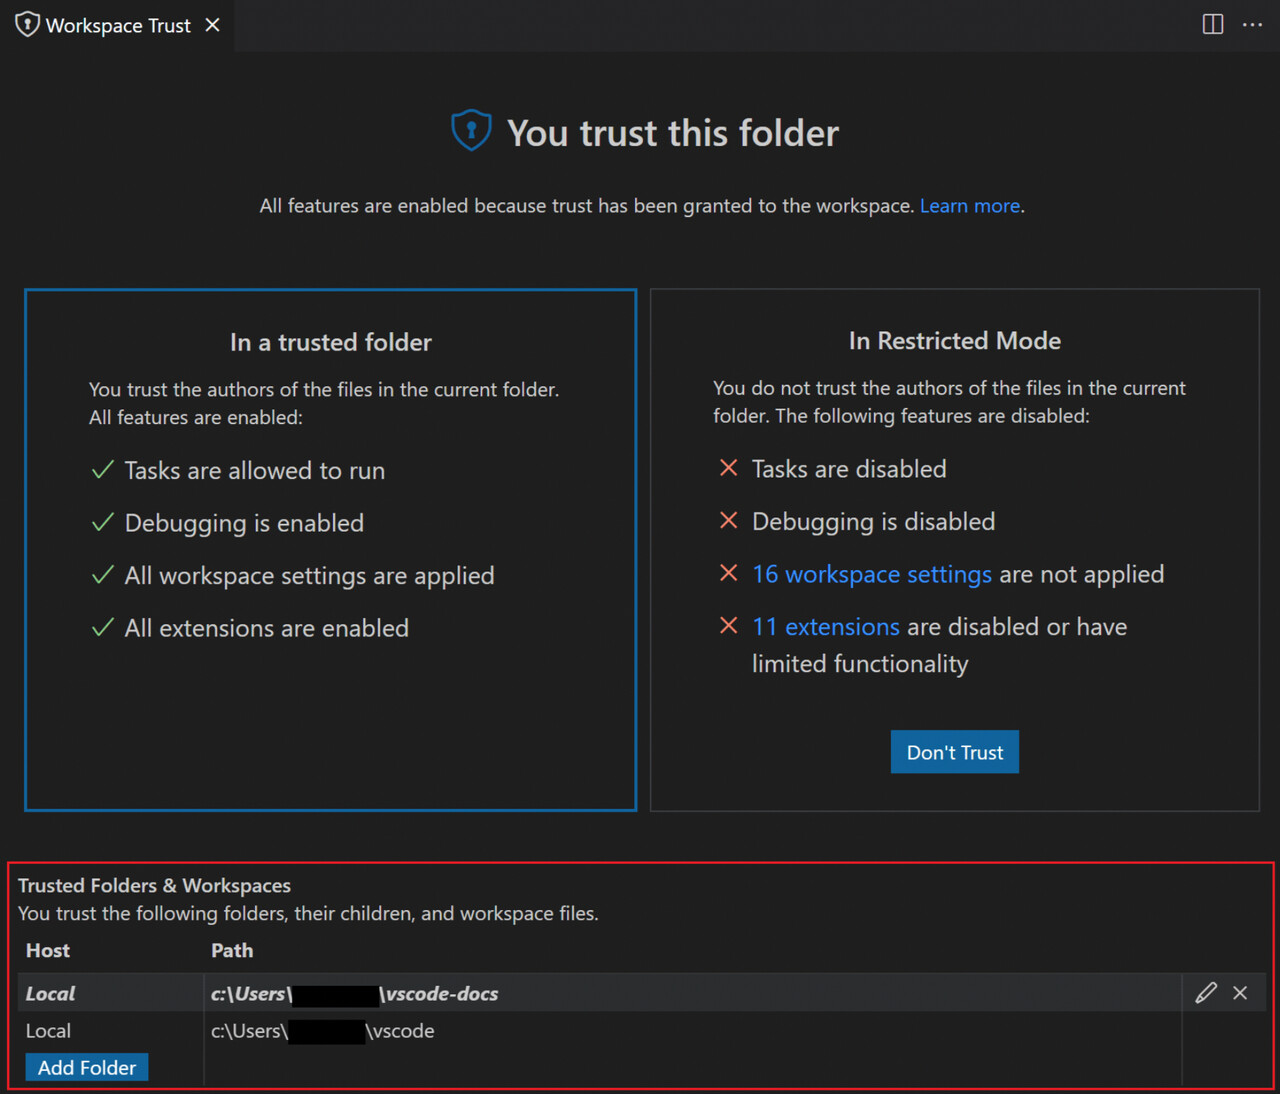
-
Win:C:\Users%username%\AppData\LocalLow\yahaha\YahahaStudio
-
Mac:/Users/%username%/Library/Application Support/Yahaha/YahahaStudio
-
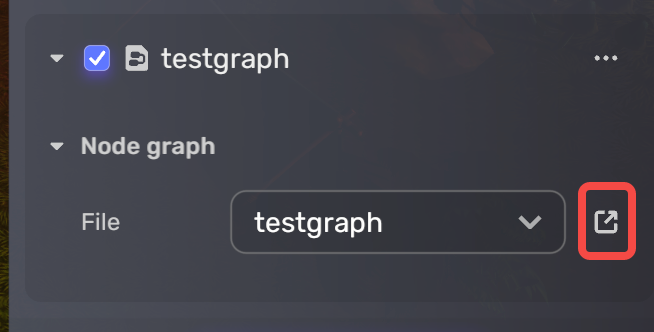
When you have finished these steps, restart your Yahaha Studio and click the “Edit” button on the node graph component you just added.
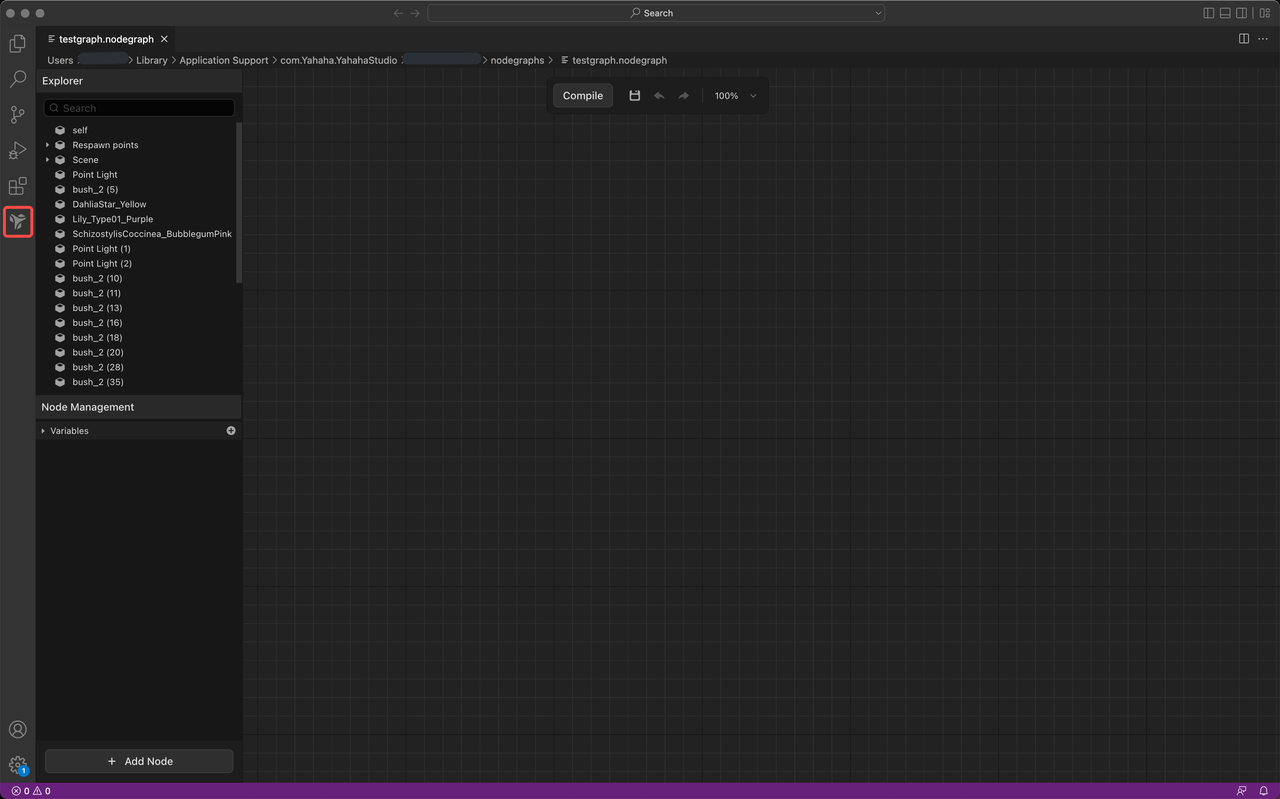
- VS Code will be opened with the chosen Yahaha node graph extension.
Coding your first Node Graph
Let’s create a bush where a butterfly hiding in! The butterfly will fly out when Avatar gets close. This Feature needs to work together with a community component named Behavior_SpawnableObjectMarker (Read more here). You can find it in the Asset Library and it’s completely free.
- Prepare your assets. Pick models for the bush and butterfly and place them in the scene.
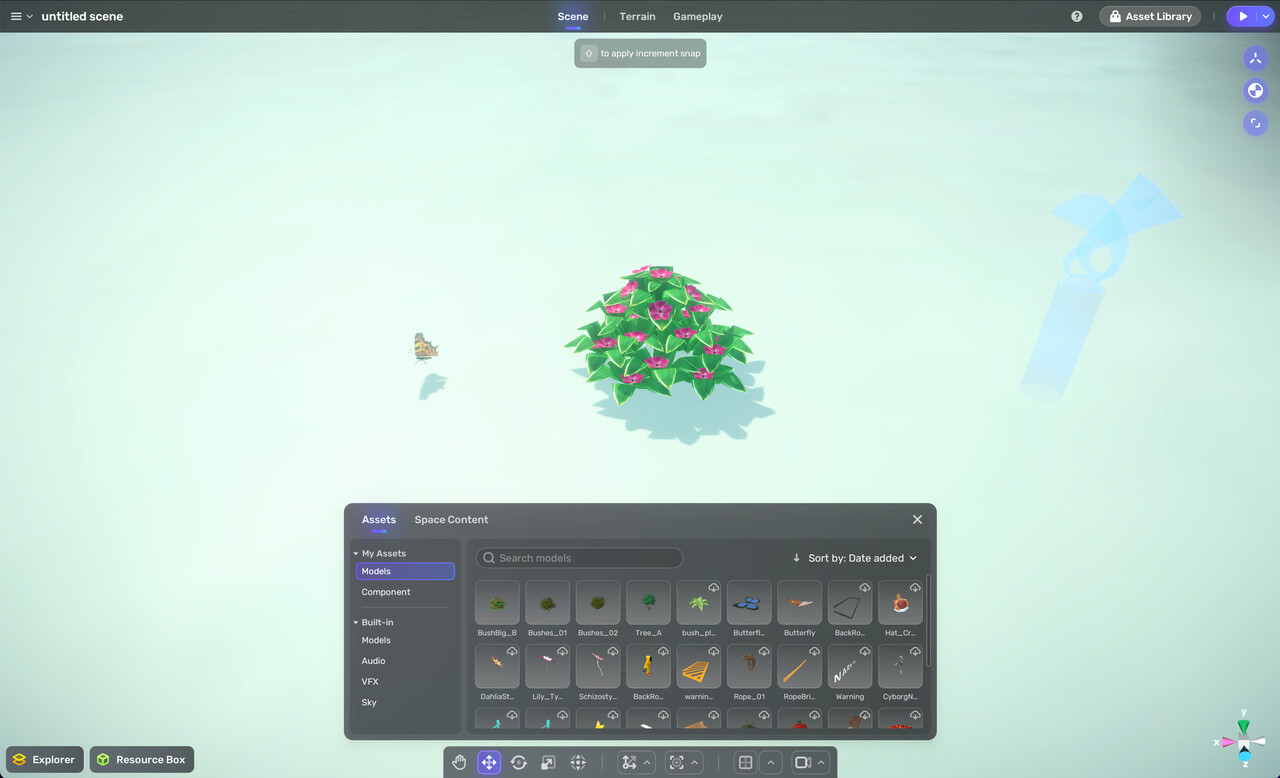
- This butterfly is a kind of “Prefab” for further use (the Prefab feature will be released in one of the upcoming releases). Open the Inspector of this butterfly and add Behavior_SpawnableObjectMarker to it. Remember to add this component to “My Assets” first.

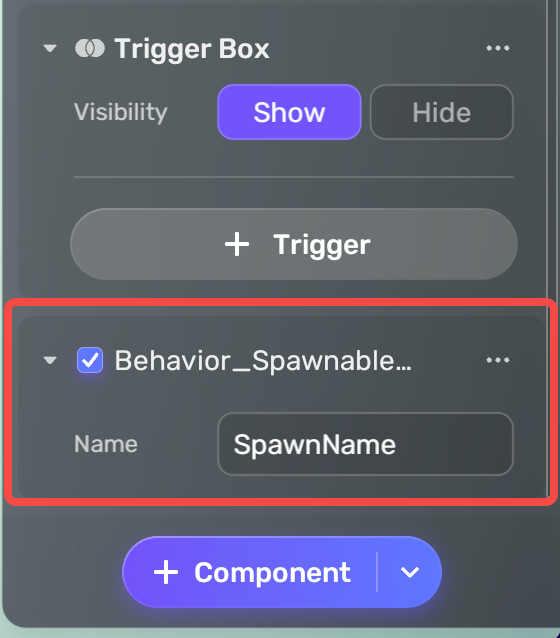
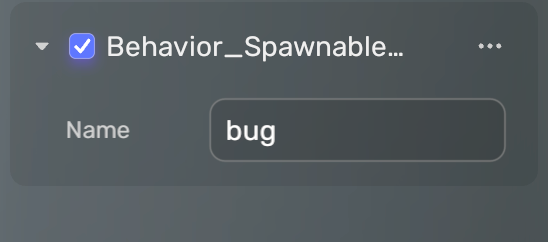
- Give this component a name, whatever you like. Let’s name it “bug”.
- Then open the Inspector of the bush. Add a node graph to it and open it with our VS Code extension.
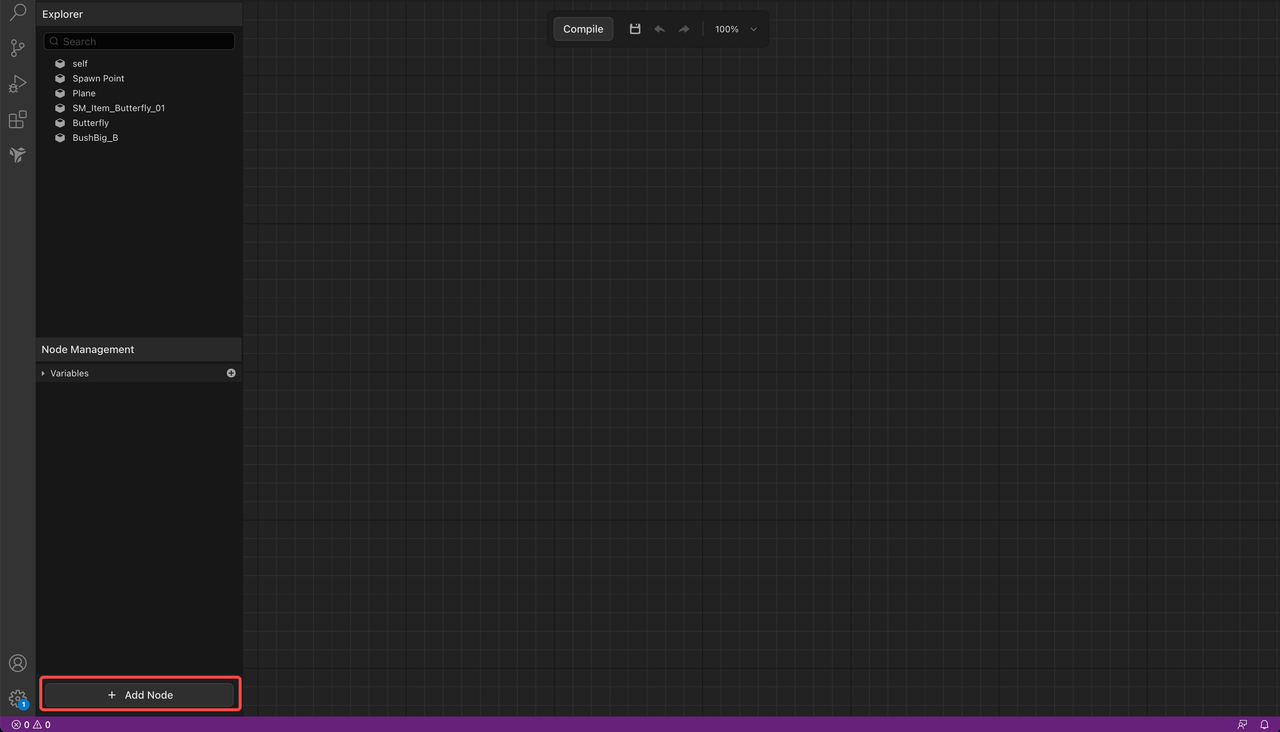
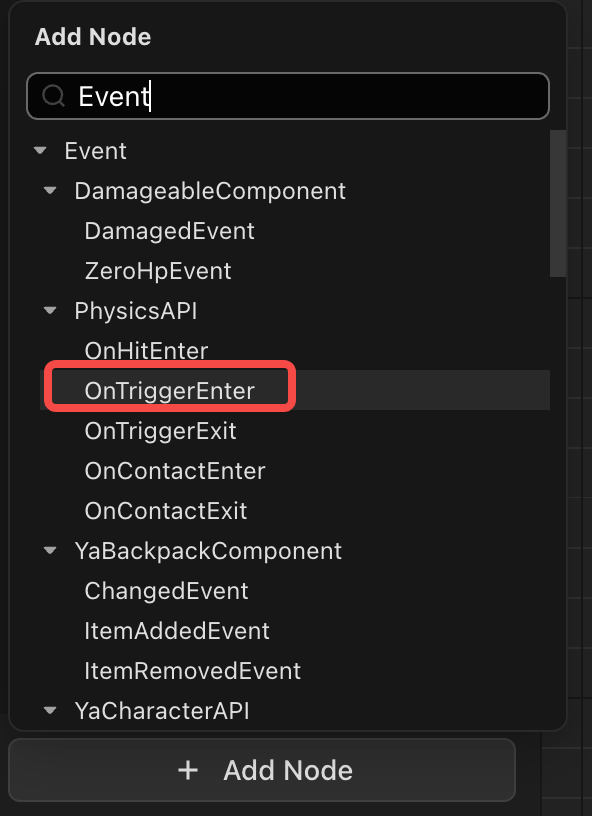
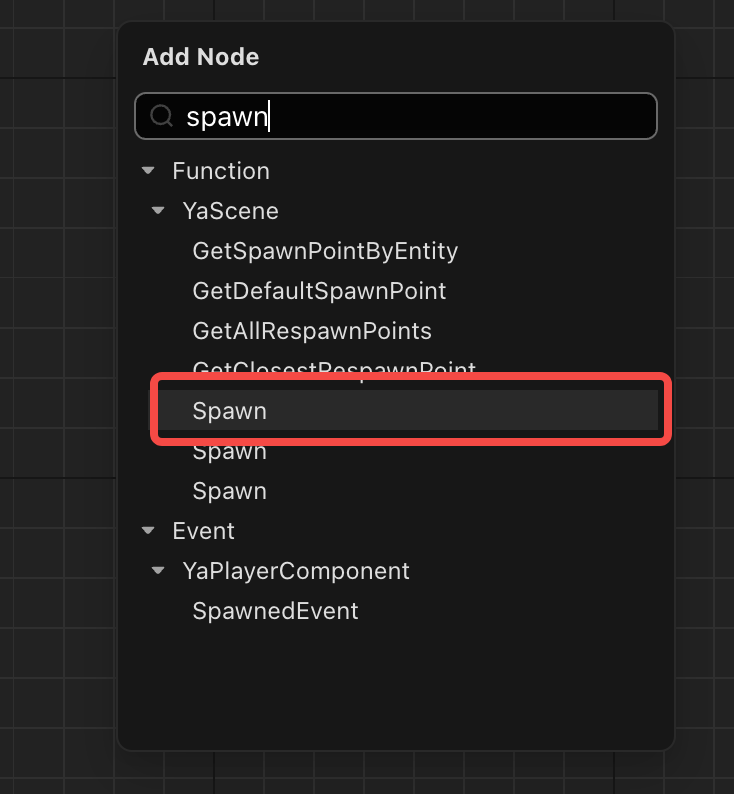
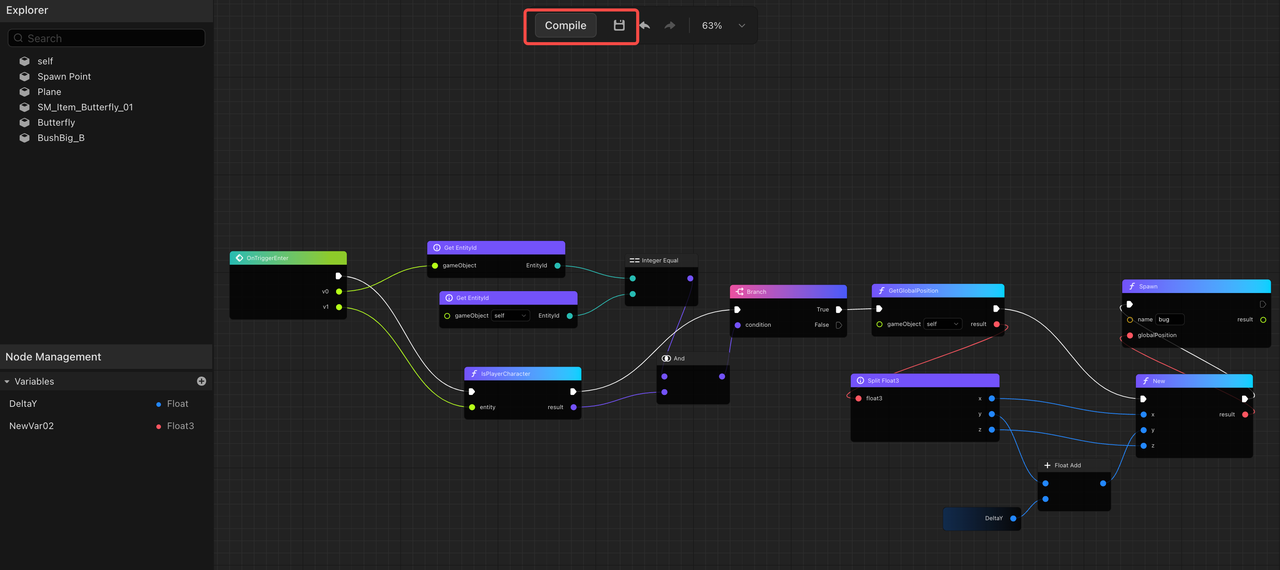
- Let’s add the first node. Click the “Add Node” button to open Node Picker. Find the OnTriggerEnter Event Node under PhysicsAPI. Drag and drop it on the Canvas to meet your first node. (You can also call Node Selector out by Right Clicking anywhere on the canvas)

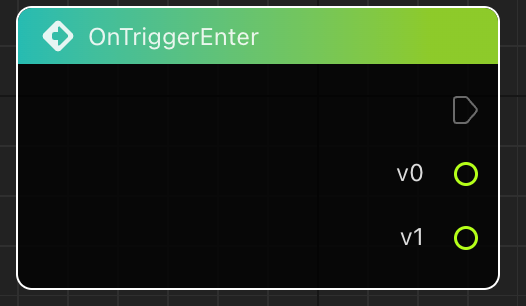
- On OnTriggerEnter node, “v0” stands for the gameObject with triggerBox and “v1” stands for the gameObject entering the triggerBox.
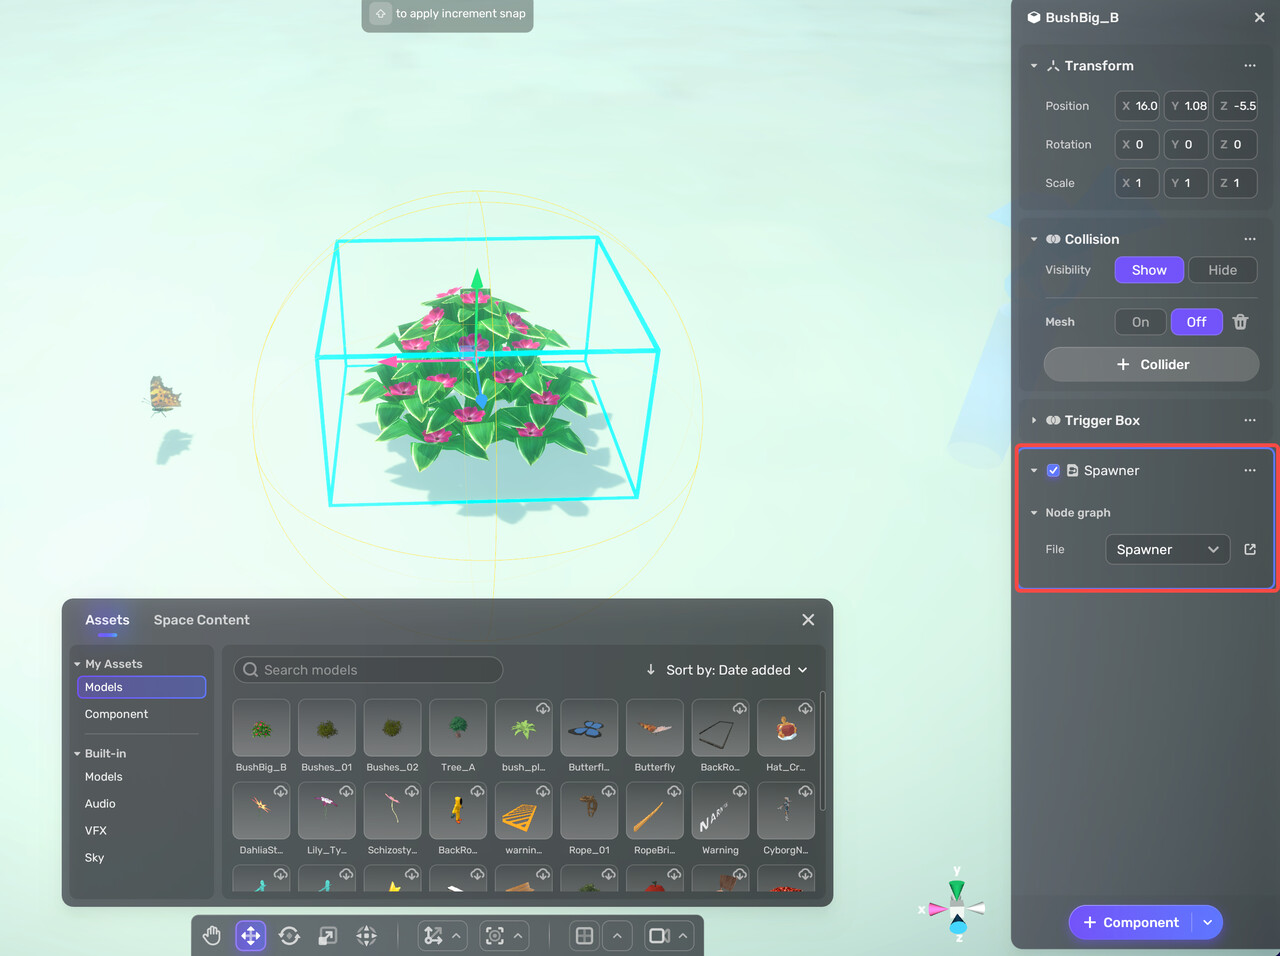
- For this event to be triggered, go back to Studio and add a triggerBox on the bush by using Trigger Box Component.

-
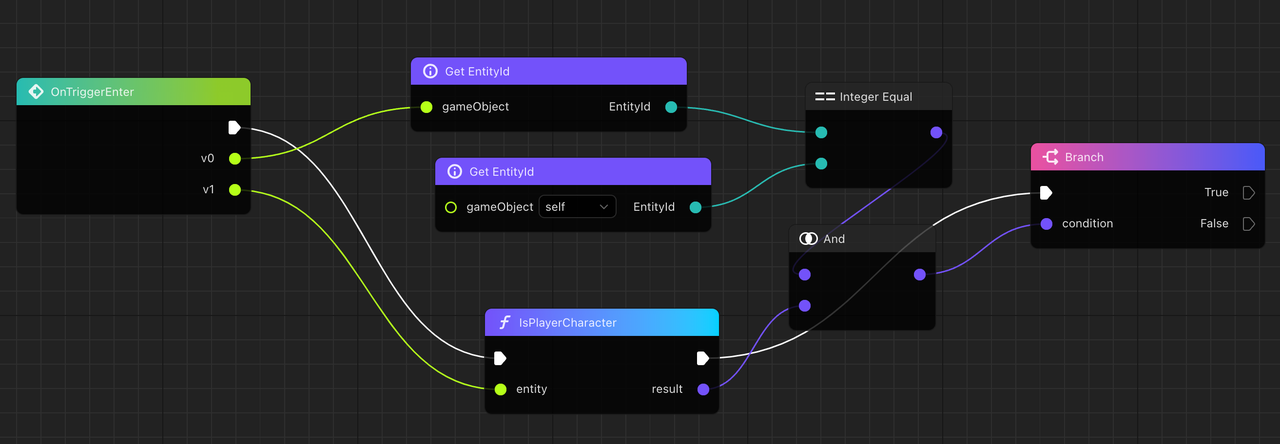
Let’s continue coding. Based on the current situation of OnTriggerEnter node, this event will be triggered by any triggerbox entered in the scene. So we need to constrain it to be triggered only when Avatars get close to the bush.
-
So just make sure “v0” is the bush itself and “v1” is Avatar by connecting the nodes below. You can find them all in Node Picker. And don’t forget to connect all the white Execution Links to make the nodes work.
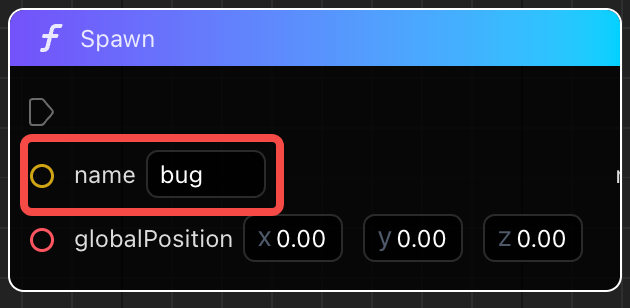
- We wanted the butterfly to show up right above the bush when the event is triggered. So we pick the first spawn node under YaScene with the globalPosition variable. Enter the name for SpawnableObjectMarker in the name field.
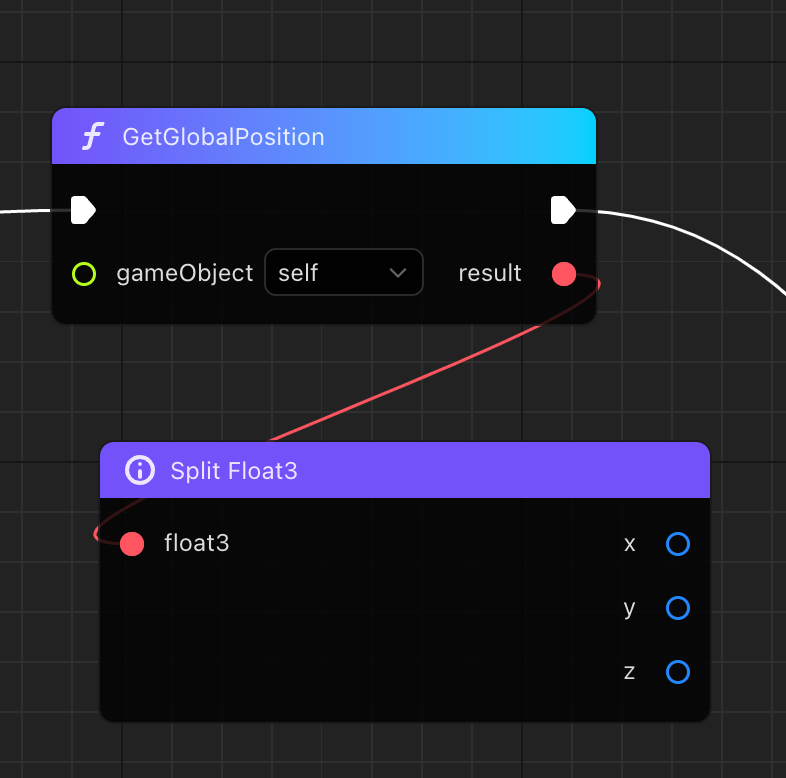
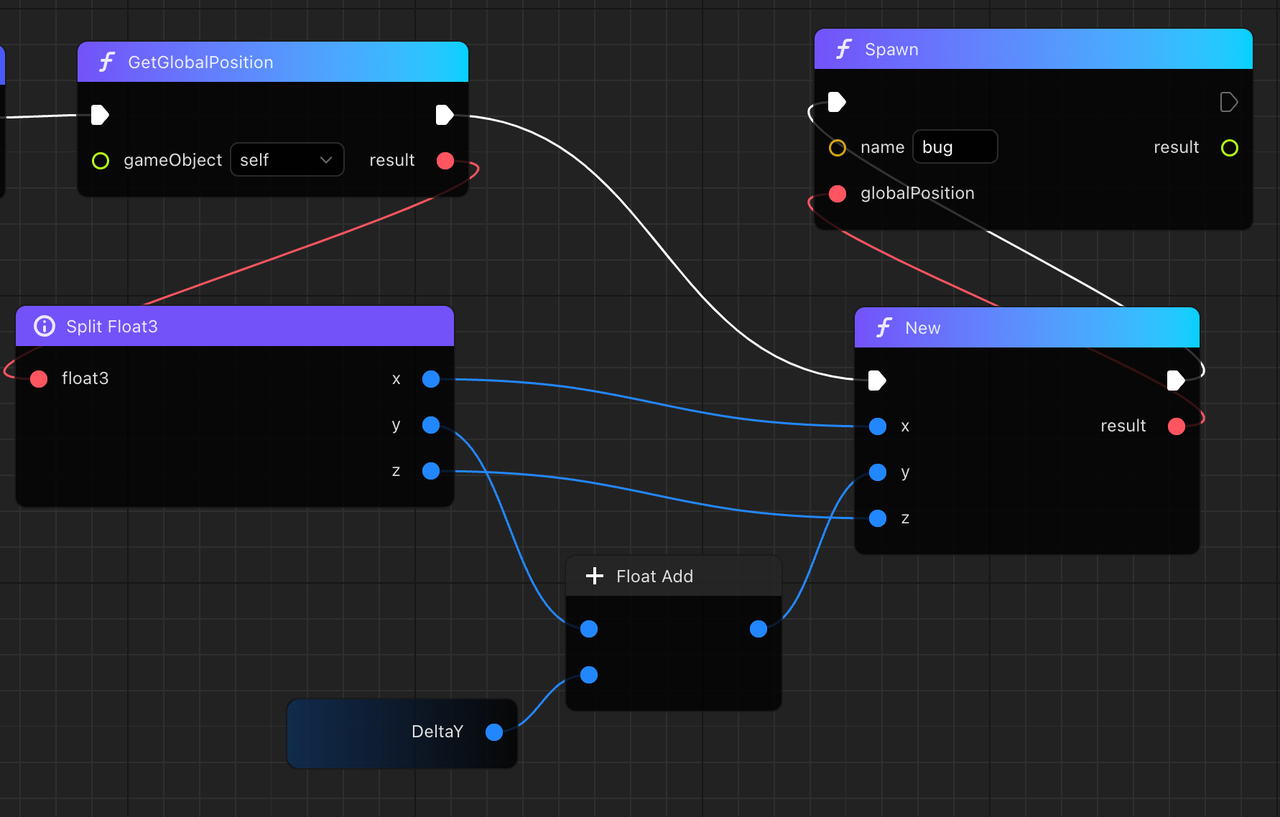
- For the target position of the spawned butterfly, we can get the position of the bush and add an extra value to its Y-axis by splitting float3. Find GetGlobalPosition under YaMovableComponent and link its result to node Split Float3.
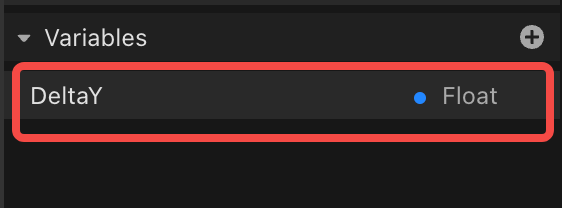
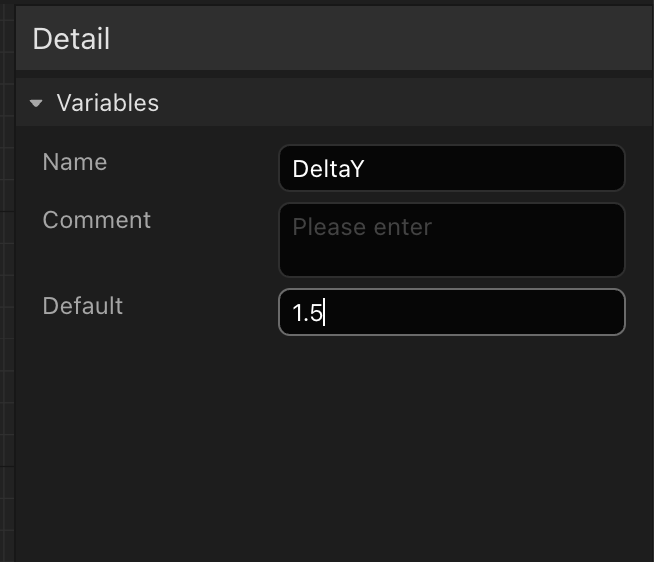
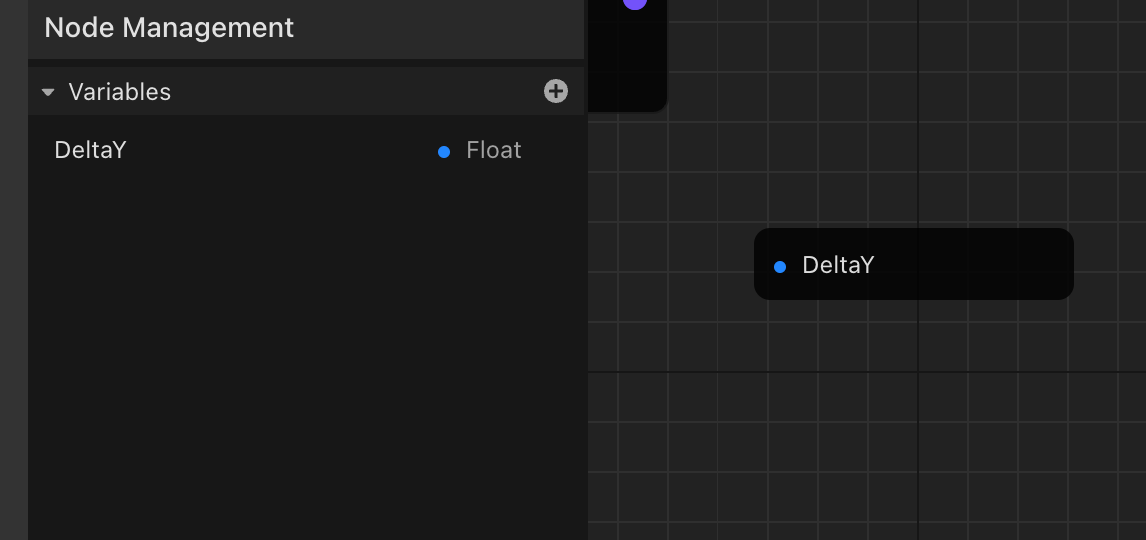
- Let’s create a variable in the Node Management panel. After clicking the “Add” button, confirm the name and data type of this variable.

- Click the variable you just created to open the “Detail” panel for it. Set a Default value in the Detail panel.
- Thus, you can drag and drop this variable to use it.

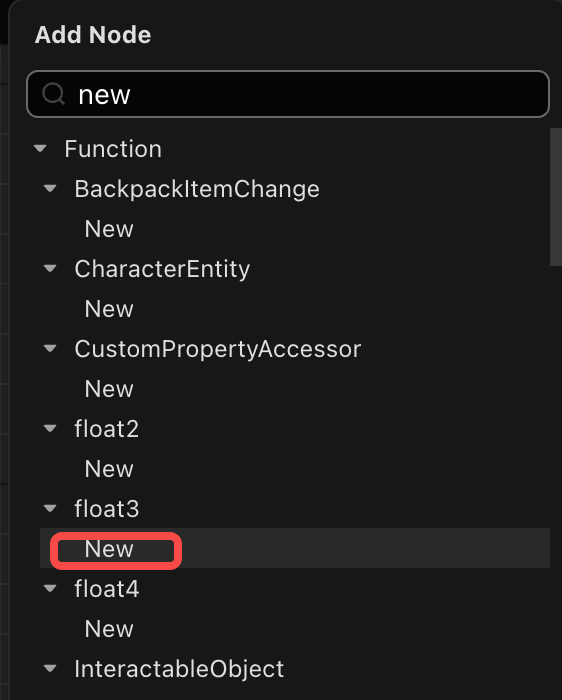
- Add the created variable to Y-Axis and create a new float3 node to hold the changed value. Connect the result of new float3 to globalPosition on node Spawn and this feature is all set.
- Before getting back to Studio, click the “Compile” button to convert the node graph to a Lua script. You can also save your work by clicking the “save” button.
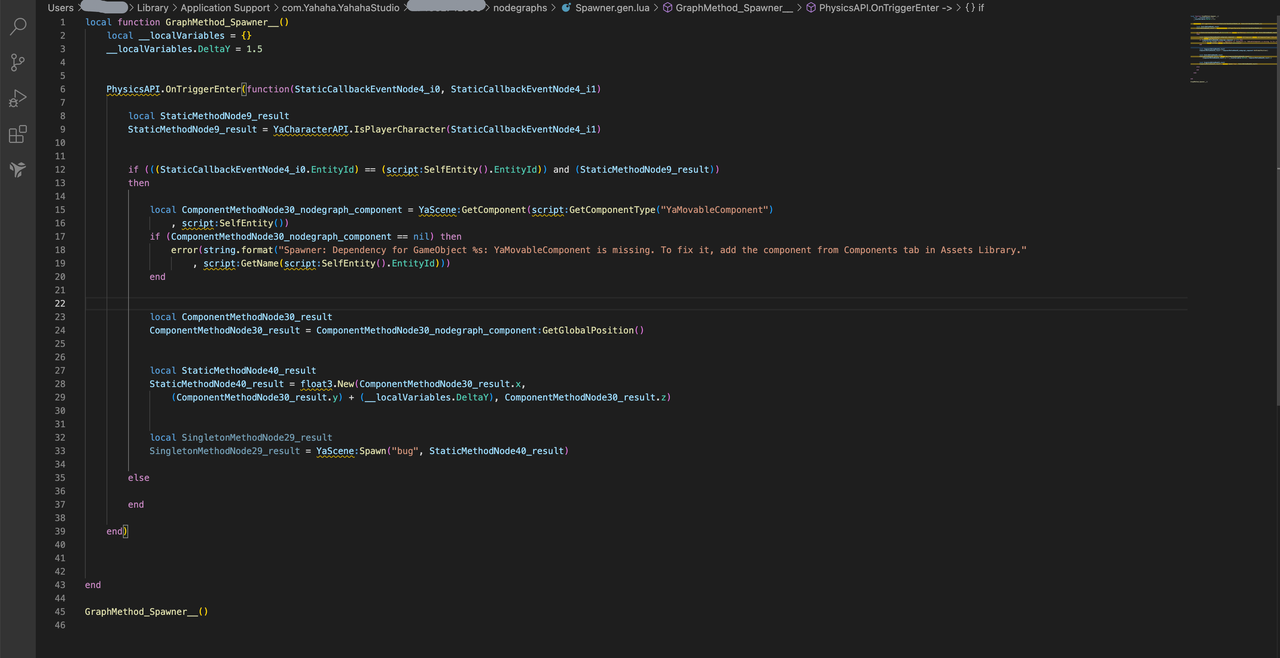
- After compiling, click filename right above the Toolbar, you can see a Lua file named (filename).gen.lua. Click this Lua file to check it out.

- This is the Lua file generated automatically from the graph you just made. You can even modify this Lua file and use it directly. Then let’s back to the Studio.
- Click the “Play” button to enter Play Mode.
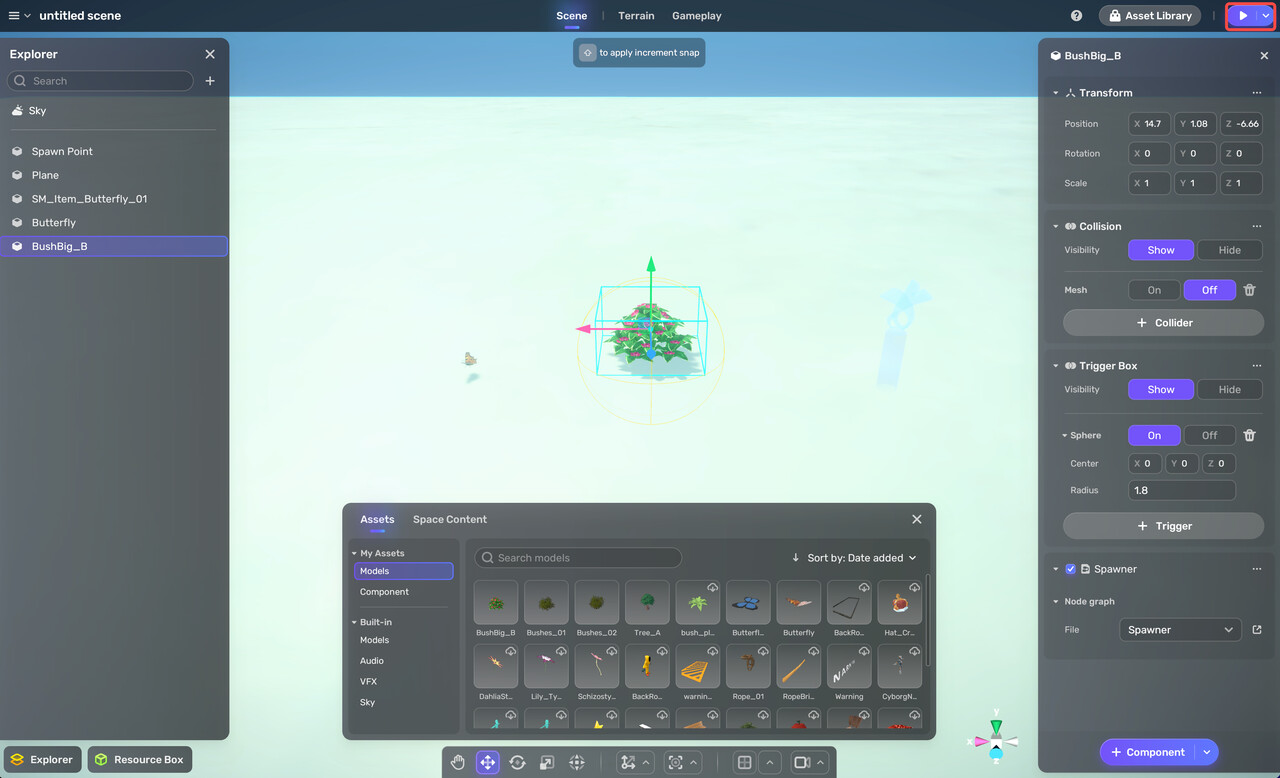
- Now when your avatar gets close to the bush, a butterfly will appear just above the bush. This is the simple feature we’ve just built with node graph. We hope you can discover more by yourself.
